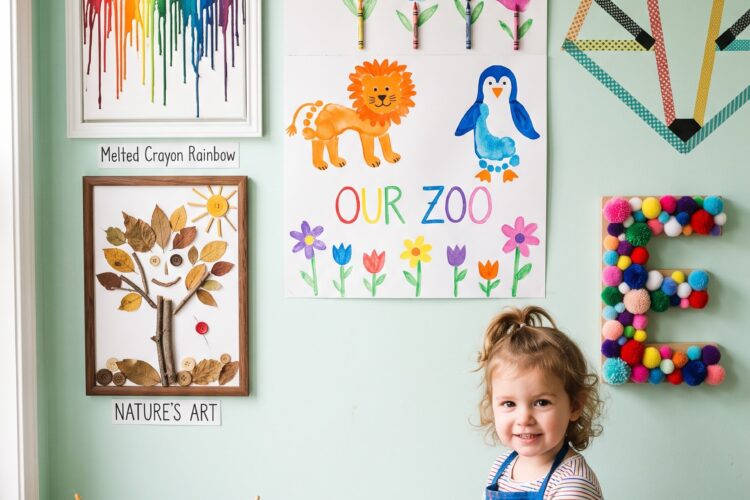
Staring at a blank wall in your kid’s room and feeling completely uninspired? You’re not alone — and the good news is, you don’t need a Pinterest-perfect craft room or a design degree to make it beautiful. DIY wall art ideas for kids are one of the easiest, cheapest ways to turn a plain nursery or bedroom into a space that actually feels personal, playful, and theirs.
Store-bought art is fine, but it’s expensive, it’s generic, and half the time it doesn’t even match your color scheme. Making your own gives you full control over the colors, the theme, and the budget — plus, several of these projects can be made with your kids, which turns decorating into a memory instead of just another chore.
Below you’ll find 35 DIY wall art ideas for kids, ranging from five-minute no-skill projects to slightly more involved weekend crafts. Whether you’re decorating a nursery, a toddler room, or a big-kid bedroom, there’s something here you can actually finish.
1. Handprint Canvas Art
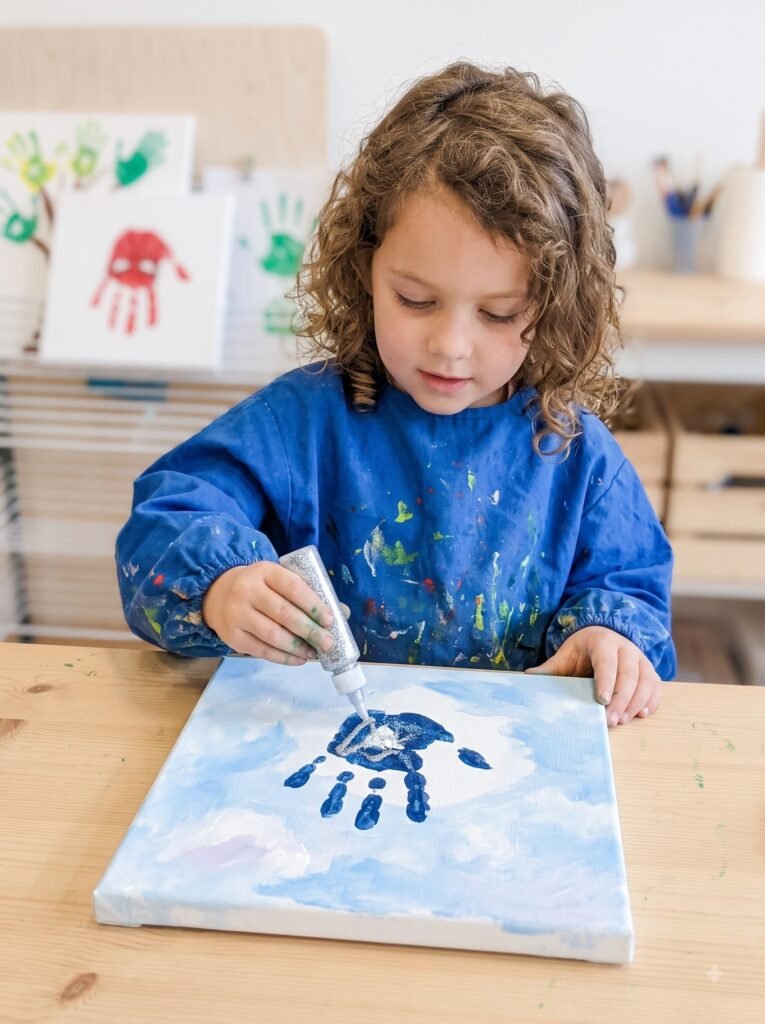
There’s a reason this one never goes out of style — a simple handprint canvas turns into a keepsake almost instantly. Grab acrylic paint, a canvas, and a willing (or squirmy) toddler, and you’ve got a piece of art that’s genuinely one of a kind.
Why parents love it: It captures a moment in time. Little hands grow fast, and this is a low-effort way to freeze that stage forever.
When it works best: Nurseries and toddler rooms, especially as a gift for grandparents too.
Implementation tips: Use washable acrylic paint and a paper plate as a palette. Press firmly but quickly — toddlers move fast, so have wipes ready before you start.
Budget-friendly alternative: Skip the canvas and use cardstock in a cheap frame from the dollar store.
Common mistake to avoid: Using too much paint, which causes smudging instead of a clean print.
Pro Tip: Do this once a year on the same canvas in different colors to create a growth timeline.
2. Washi Tape Geometric Wall Design
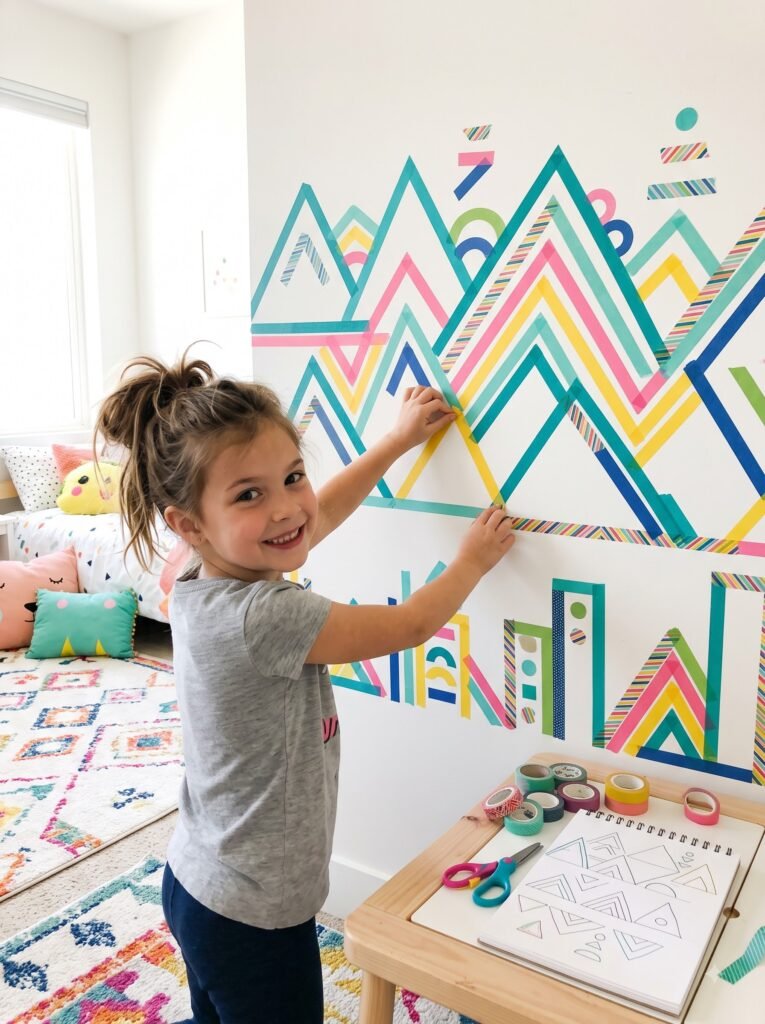
If you want color and pattern without touching a paintbrush, washi tape is your best friend. Create triangles, chevrons, or a sunburst pattern directly on the wall using colorful tape.
Why parents love it: Zero commitment — washi tape peels off without damaging paint, making it perfect for renters.
When it works best: Big-kid rooms where you want a bold accent wall without repainting.
Implementation tips: Sketch your pattern lightly in pencil first, then apply tape following the lines.
Budget-friendly alternative: Regular colored electrical tape works in a pinch, though the color range is more limited.
Common mistake to avoid: Pressing tape onto freshly painted walls — wait at least two weeks or the paint may peel when you remove it.
Quick Tip: Let your child help choose the pattern; it makes the room feel truly theirs.
3. DIY Constellation Art With Glow Stars
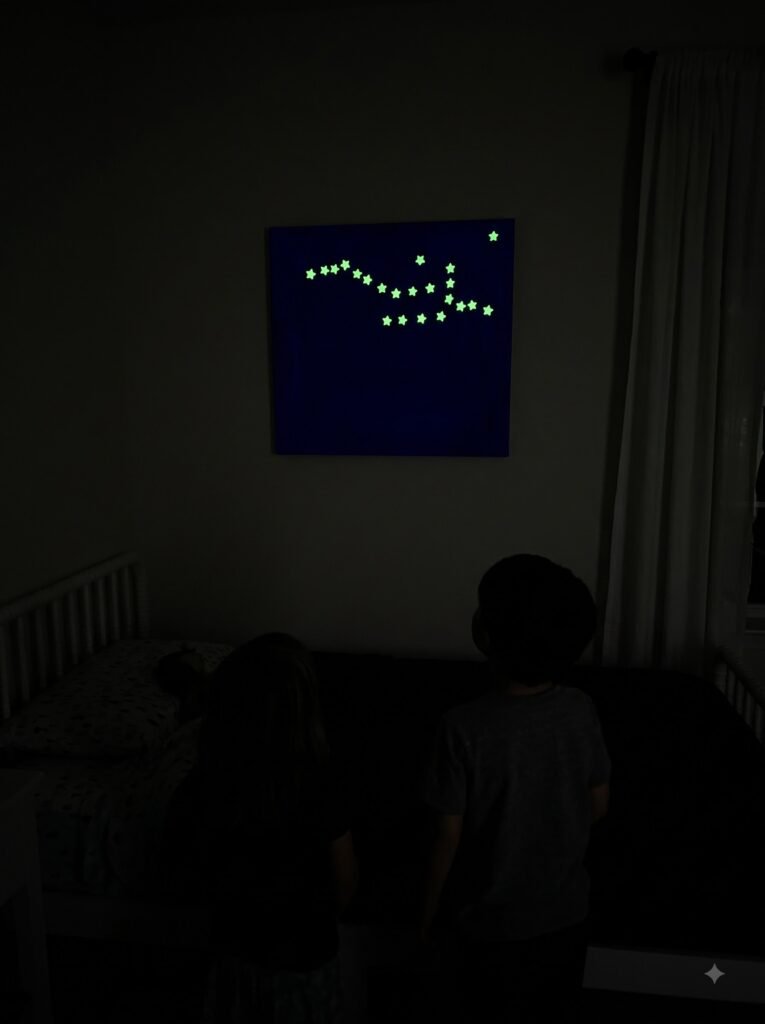
Paint a dark canvas or poster board, then add glow-in-the-dark star stickers in real or made-up constellations. It’s magical at night and still charming during the day.
Why parents love it: It doubles as a nightlight of sorts and sparks curiosity about space.
When it works best: Bedrooms, especially for kids who are a little nervous about the dark.
Implementation tips: Use a navy or black canvas so the glow stickers really pop once the lights go off.
Budget-friendly alternative: Skip the canvas entirely and stick the stars directly onto the ceiling.
Safety consideration: Choose adhesive stickers rated safe for painted walls and ceilings so they don’t leave residue.
Pro Tip: Photograph the layout before bed so you can recreate favorite constellations later if any stars fall off.
4. Painted Wooden Letter Name Display
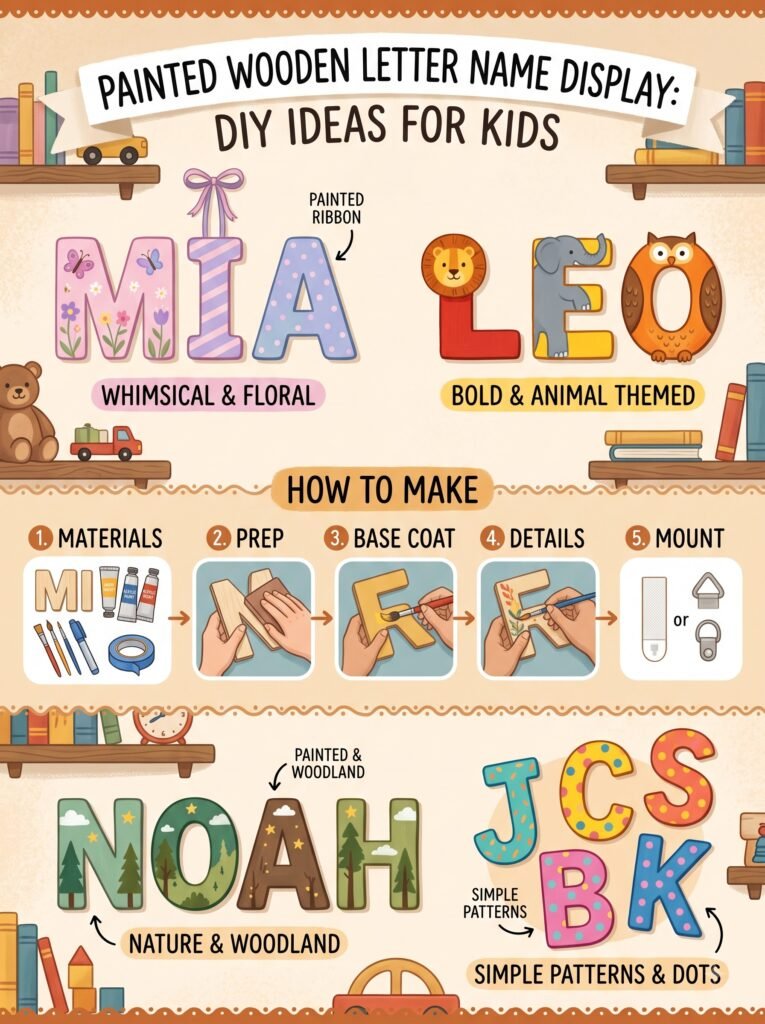
Wooden letters spelling out your child’s name, painted in coordinating colors and hung above the bed or crib, is a nursery classic for a reason.
Why parents love it: It’s personalized, timeless, and works with literally any color scheme.
When it works best: Nurseries and toddler rooms — this is a project you’ll likely keep up for years.
Implementation tips: Buy unfinished wooden letters from a craft store and paint each one a different shade from your palette for a playful, non-matchy look.
Budget-friendly alternative: Cut letters from sturdy cardboard and cover them with decorative paper instead of paint.
Common mistake to avoid: Hanging letters too high — keep them at a height where toddlers can eventually point to and “read” their name.
5. Torn Paper Rainbow Collage
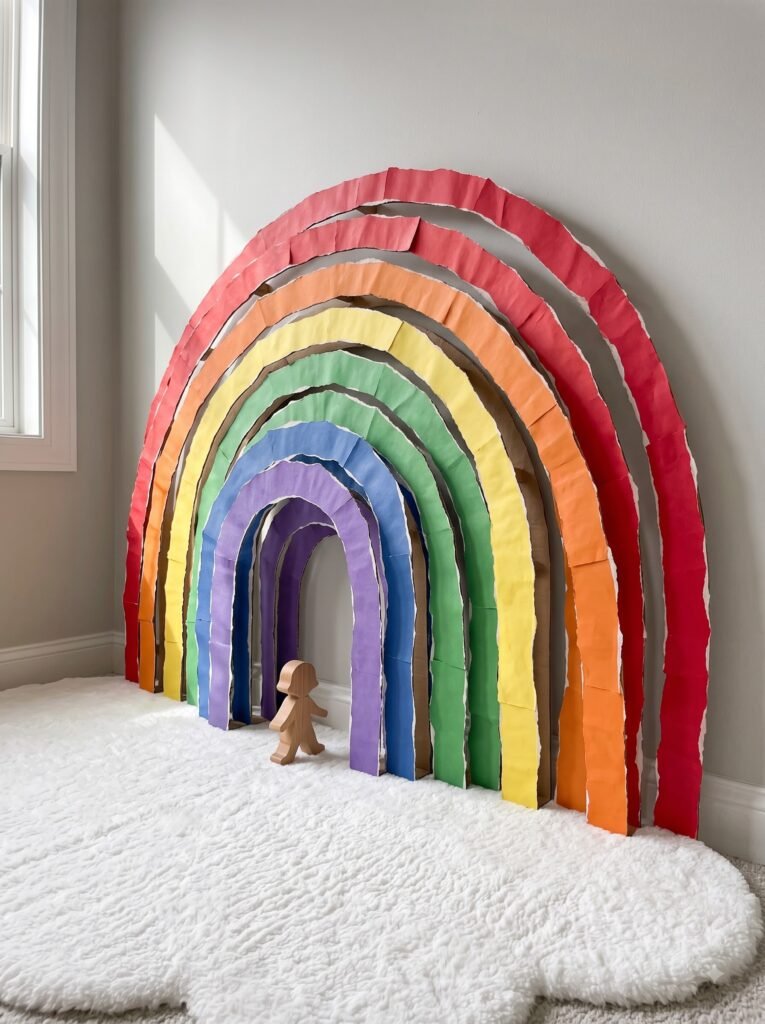
This one is genuinely toddler-proof. Tear colored construction paper into strips and glue them onto poster board in rainbow arcs — no cutting skills required.
Why parents love it: It’s a fantastic fine-motor activity disguised as a craft project.
When it works best: Playrooms or as a fun rainy-day activity that results in usable art.
Implementation tips: Pre-sort the paper by color into small bowls so little hands can grab and go.
Budget-friendly alternative: Use old magazine pages or newspaper, then color over them for a mixed-media effect.
Common mistake to avoid: Using liquid glue, which causes warping — a glue stick works much better for paper collage.
6. Framed Kid Artwork Gallery Wall
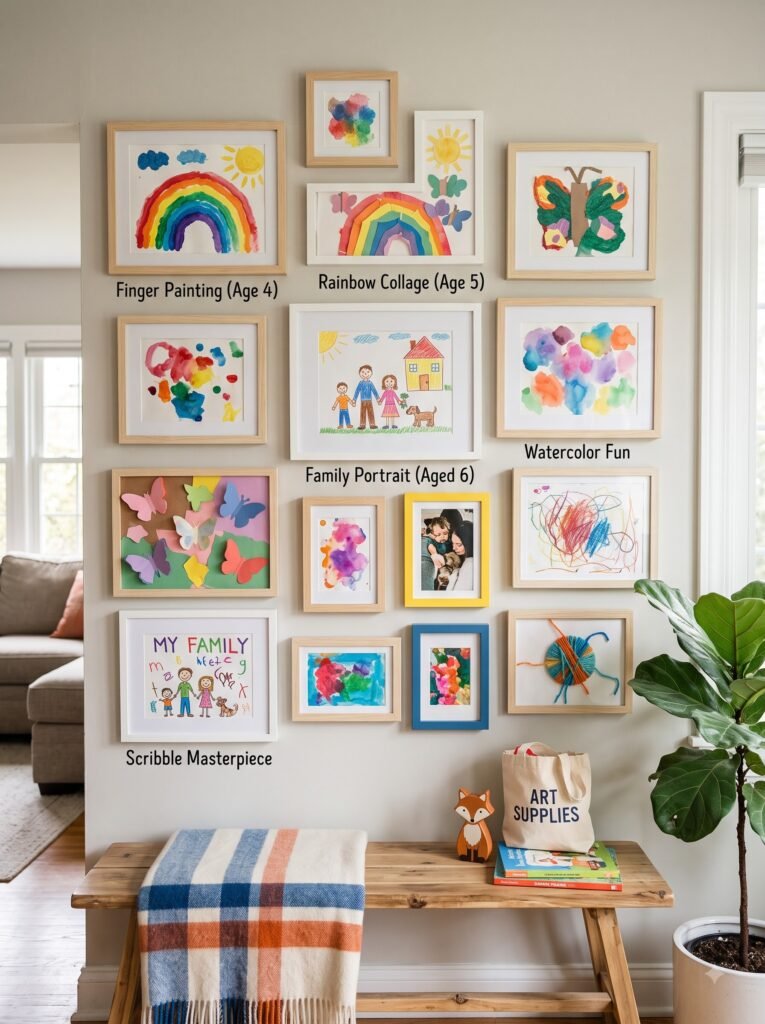
Instead of buying art, frame the art your child already makes. Rotate pieces seasonally in a cluster of matching frames for an ever-changing gallery wall.
Why parents love it: It validates your child’s creativity and solves the “what do I do with all these drawings” problem at the same time.
When it works best: Hallways, playrooms, or above a homework desk.
Implementation tips: Buy frames with clip-open backs so you can swap artwork in seconds without re-hanging anything.
Budget-friendly alternative: Use clipboards hung on hooks instead of frames — even easier to swap out.
Expert Advice: Keep the frame colors consistent (all white or all black) so the wall feels curated even as the art inside constantly changes.
7. DIY Ombre Painted Canvas
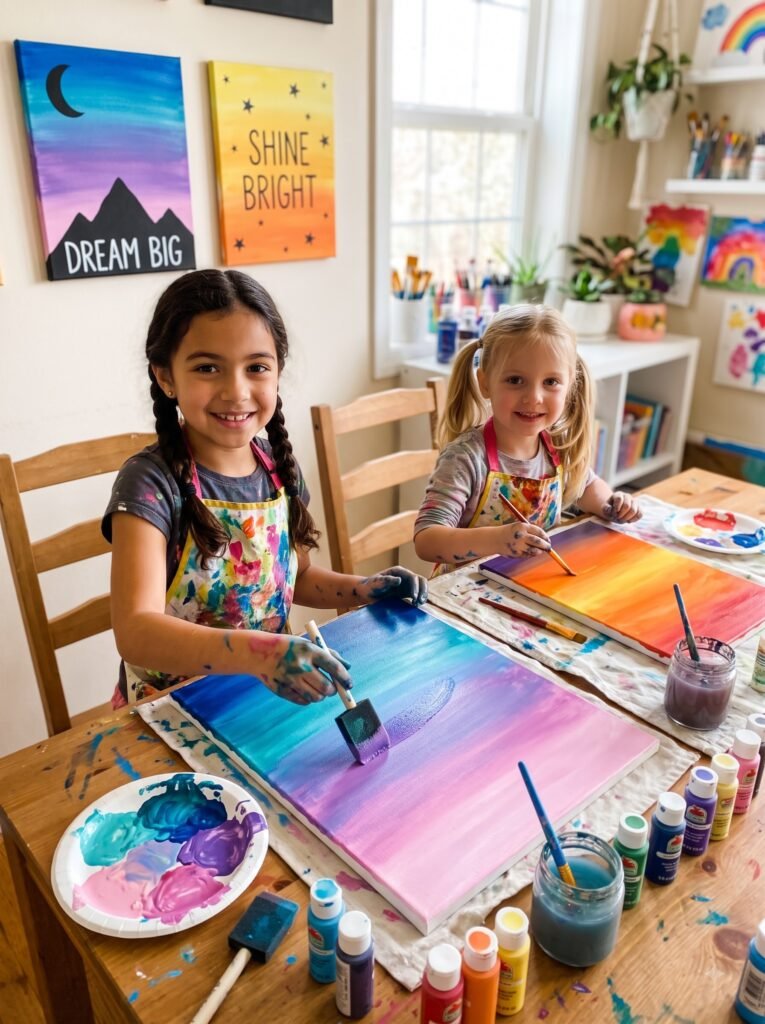
Teach older kids a simple color-blending technique by painting a canvas in an ombre gradient — light to dark in their favorite color.
Why parents love it: It looks surprisingly sophisticated for something so simple to make.
When it works best: Tween and teen rooms where you want something more grown-up than character-themed decor.
Implementation tips: Blend adjacent paint sections while still wet using a dry brush in soft, circular motions.
Common mistake to avoid: Working too slowly — acrylic paint dries fast, so blend within a minute or two of applying each section.
Pro Tip: A foam roller creates a smoother gradient than a brush for beginners.
8. Nature Print Leaf & Flower Art
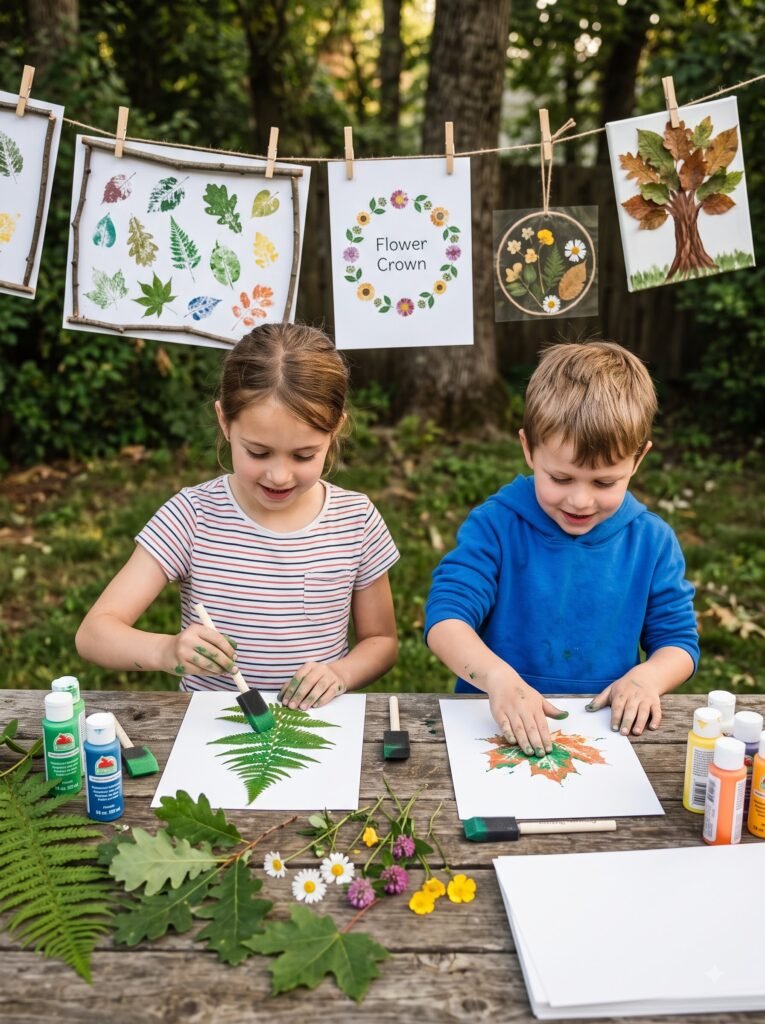
Press real leaves and flowers, then arrange and glue them onto cardstock for a botanical piece that costs almost nothing.
Why parents love it: It connects kids to nature and works beautifully for a woodland or garden-themed room.
When it works best: Spring and summer, when fresh leaves and flowers are easy to find on a walk.
Implementation tips: Press specimens between the pages of a heavy book for 3–5 days before arranging them.
Budget-friendly alternative: Use silk or paper flowers cut from scrapbook paper if pressing isn’t practical.
Common mistake to avoid: Gluing flowers while they’re still slightly damp, which leads to mold under glass frames.
9. DIY Felt Cloud & Rainbow Mobile-Style Wall Hanging
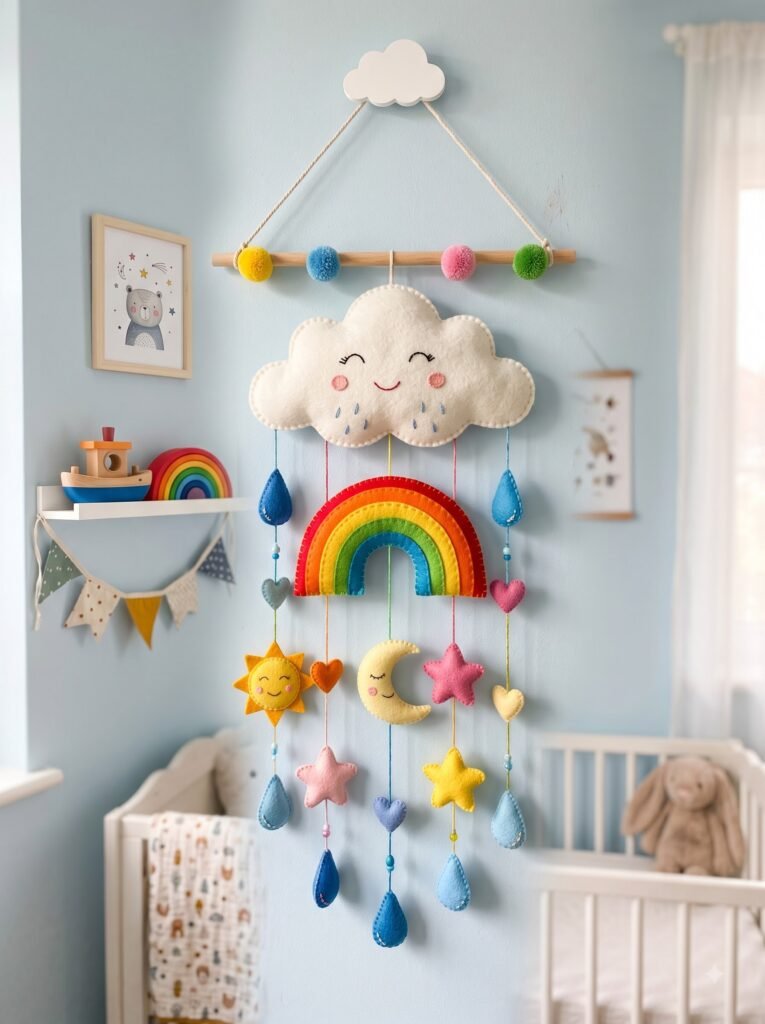
Cut felt into cloud and rainbow shapes, layer them, and mount them on the wall for a soft, dimensional piece.
Why parents love it: Felt is soft, safe, and forgiving — perfect for a first sewing or no-sew project.
When it works best: Nurseries with a soft, pastel color palette.
Implementation tips: Use fabric glue instead of sewing if you want a true no-skill version.
Safety consideration: Secure firmly to the wall with mounting strips so nothing comes loose over a crib.
Quick Tip: Layer 2–3 shades of the same color for a subtle dimensional effect.
10. Chalkboard Paint Growth Chart Wall Art
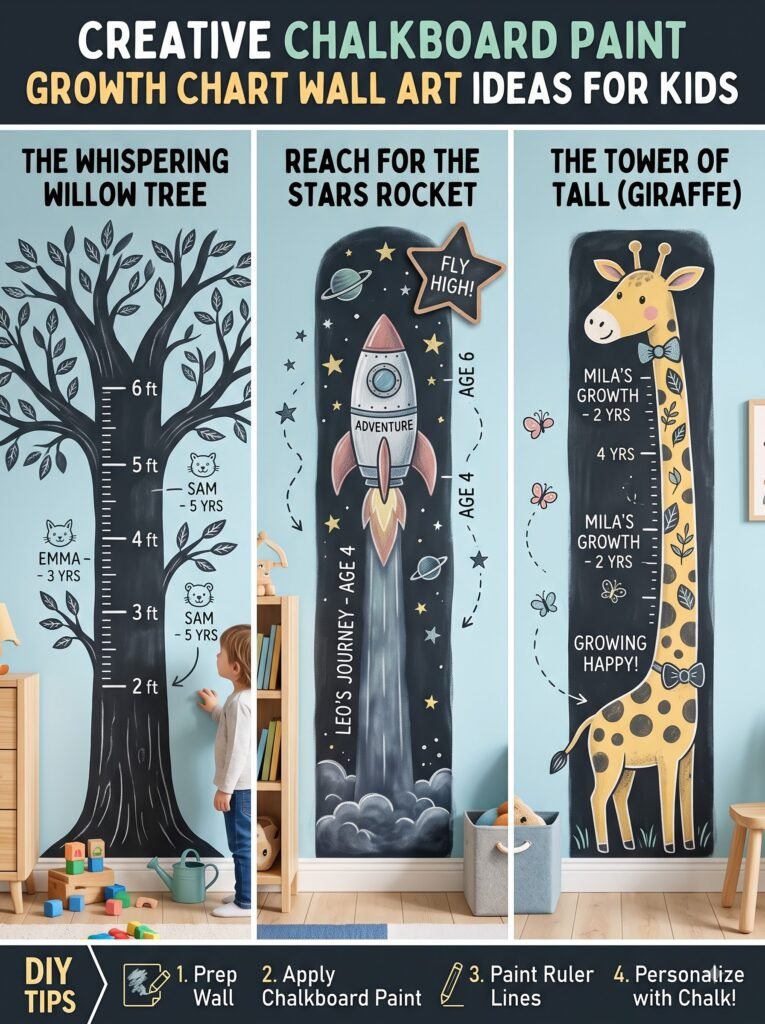
Paint a tall, narrow board (or a section of wall, if you’re bold) with chalkboard paint and turn it into a growth chart doubling as art.
Why parents love it: It’s functional art that becomes more meaningful every single year.
When it works best: Playrooms, hallways, or bedroom closet doors.
Implementation tips: Apply at least two coats of chalkboard paint and let it cure fully (check the can — usually 24–72 hours) before the first measurement.
Budget-friendly alternative: Use a large wooden board instead of a wall so you can take it with you if you move.
Common mistake to avoid: Measuring right after painting — chalkboard paint needs to fully cure or the surface will smudge.
11. DIY Marbled Paper Wall Art
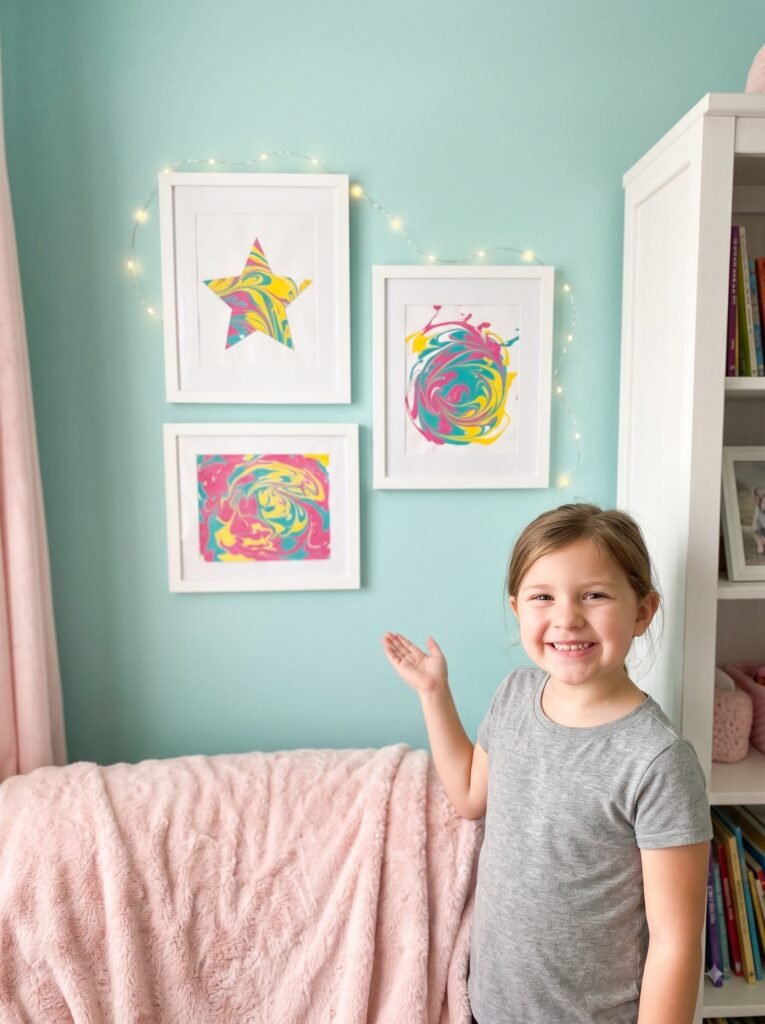
Swirl shaving cream and food coloring in a shallow tray, press paper on top, then scrape it off to reveal a marbled pattern.
Why parents love it: It’s mesmerizing to watch and the results are genuinely gallery-worthy.
When it works best: A weekend activity with older kids who can handle a bit of mess.
Implementation tips: Work on a covered table and use card stock, which holds up better than thin paper.
Common mistake to avoid: Leaving the paper on too long — a few seconds is enough to pick up the color.
Parent Hack: Do this outside on a warm day for the easiest cleanup possible.
12. Personalized Milestone Photo Wall
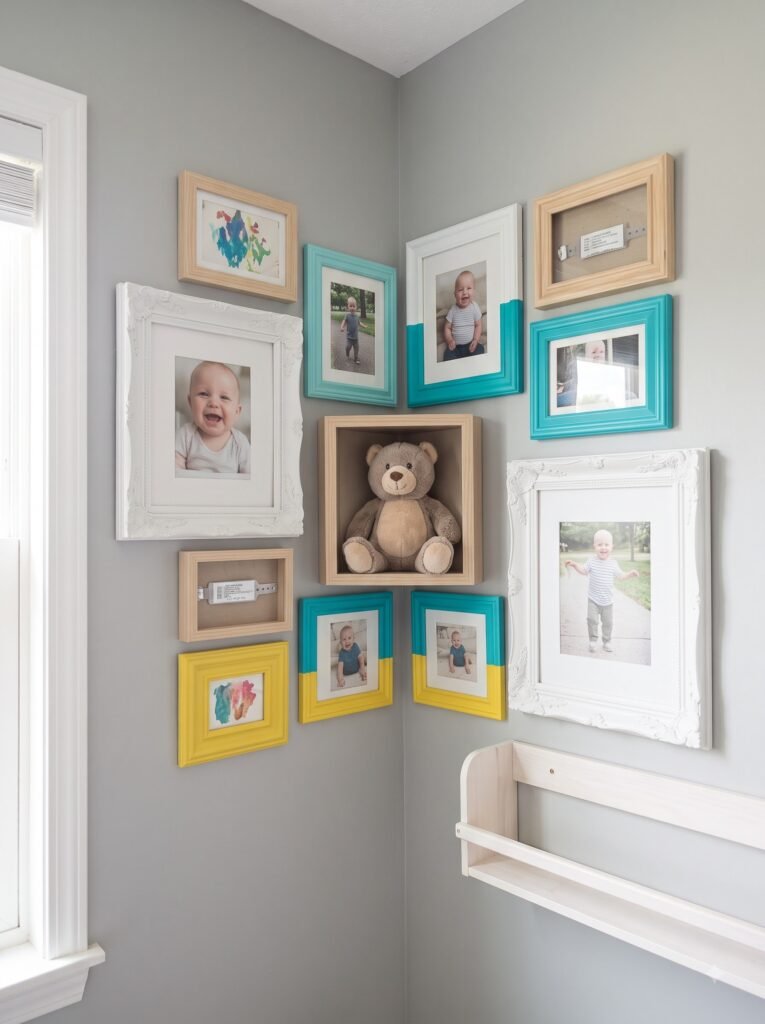
Create a simple grid of framed photos marking milestones — first smile, first steps, first birthday — for a wall that tells a story
Why parents love it: It’s sentimental without being overly crafty, and it grows more special over time.
When it works best: Hallways or above a changing table in the early years.
Implementation tips: Stick to a single frame style and color for a cohesive, gallery-like look.
Budget-friendly alternative: Print photos at home on cardstock and use washi tape instead of frames.
13. DIY Yarn Wall Hanging
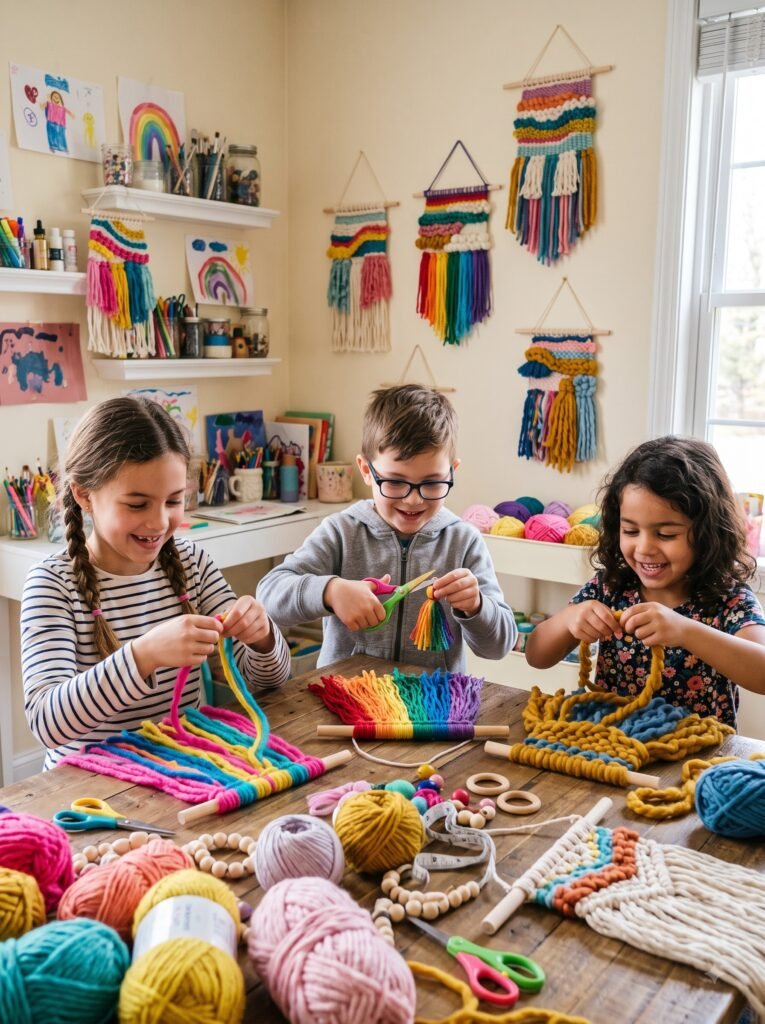
Wrap colorful yarn around a wooden dowel in stripes or patterns for a boho-style wall hanging that adds texture without much effort.
Why parents love it: It’s trendy, tactile, and surprisingly quick to make.
When it works best: Toddler and big-kid rooms with a neutral color palette that needs a pop of color.
Implementation tips: Tie yarn strands to the dowel using a simple lark’s head knot, then trim ends evenly at the bottom.
Common mistake to avoid: Using yarn that’s too thin — bulkier yarn creates a fuller, more polished look with less effort.
14. DIY Puzzle Piece Word Art
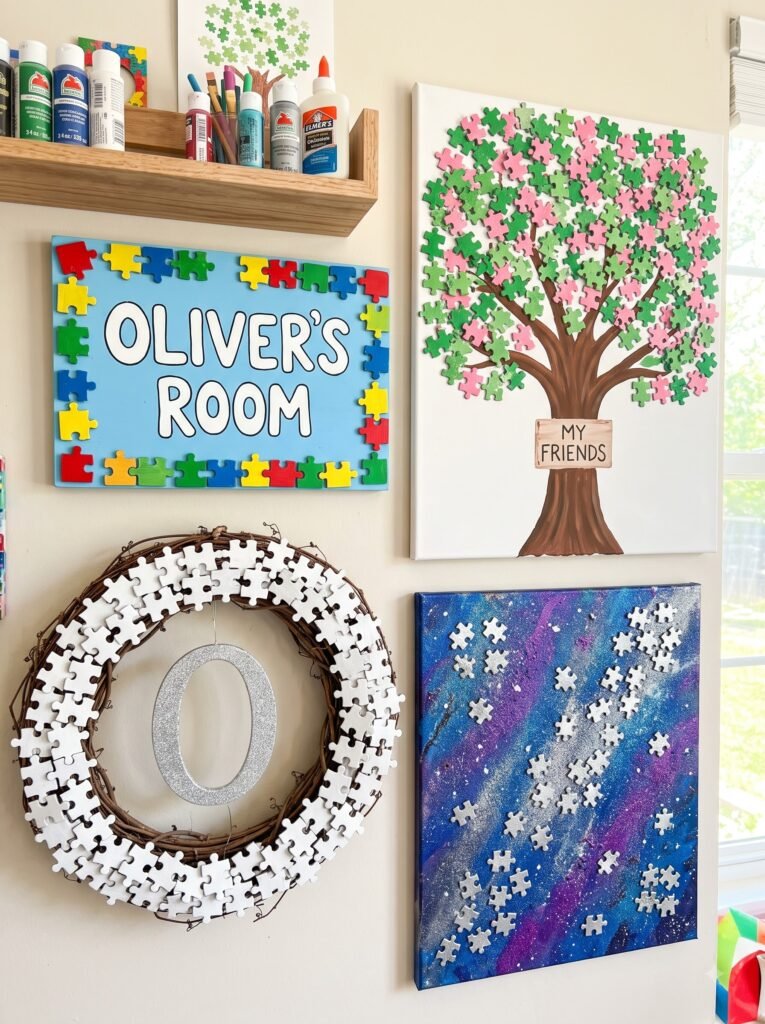
Take an old jigsaw puzzle nobody plays with anymore, paint each piece a different color, and arrange them to spell a word like “PLAY” or your child’s initials.
Why parents love it: It repurposes something that would otherwise be thrown away and turns it into a statement piece.
When it works best: Playrooms — the puzzle theme fits right in.
Implementation tips: Glue finished pieces onto a wood board or thick cardboard backing before hanging.
Budget-friendly alternative: Buy a cheap secondhand puzzle specifically for this project.
Pro Tip: Seal painted pieces with a matte spray sealant so colors don’t chip over time.
15. DIY Fabric-Covered Canvas Panels
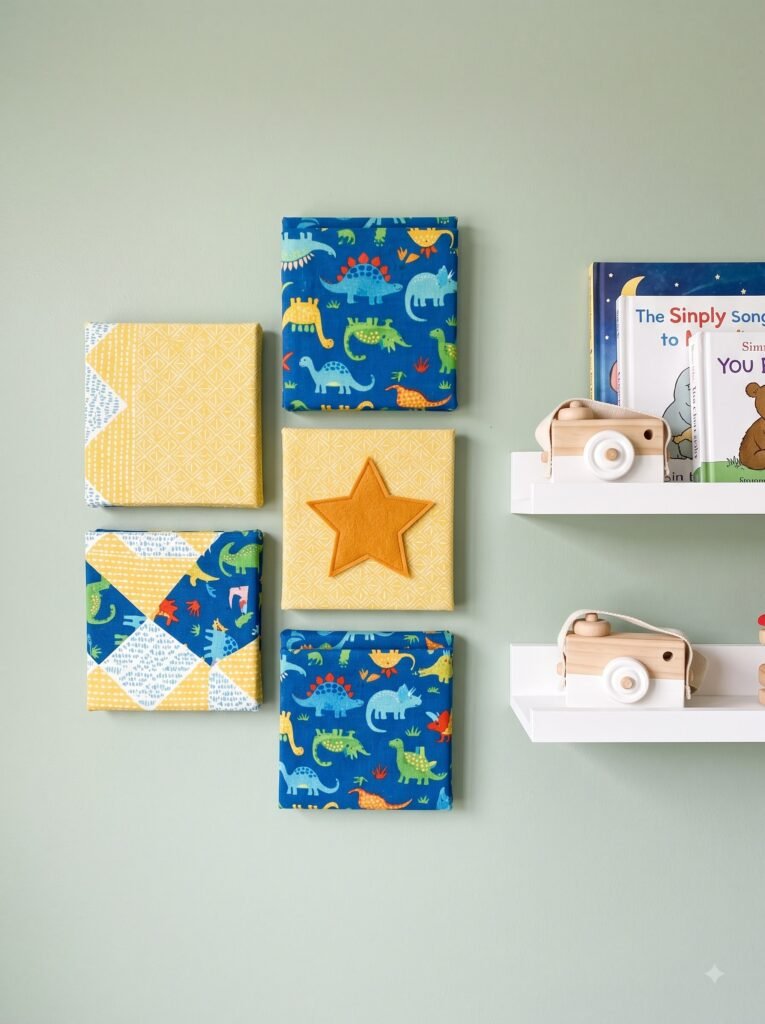
Stretch pretty fabric — even an old crib sheet — over a canvas or foam board and staple it to the back for an instant, no-paint art piece.
Why parents love it: It’s nearly foolproof and lets you match fabric exactly to your existing decor.
When it works best: Anywhere you want a large piece of art fast, especially nurseries.
Implementation tips: Pull fabric taut and staple opposite sides first (top, then bottom, then sides) to avoid puckering.
Common mistake to avoid: Choosing fabric that’s too thin — it can show the canvas texture underneath.
16. DIY Watercolor Splatter Art
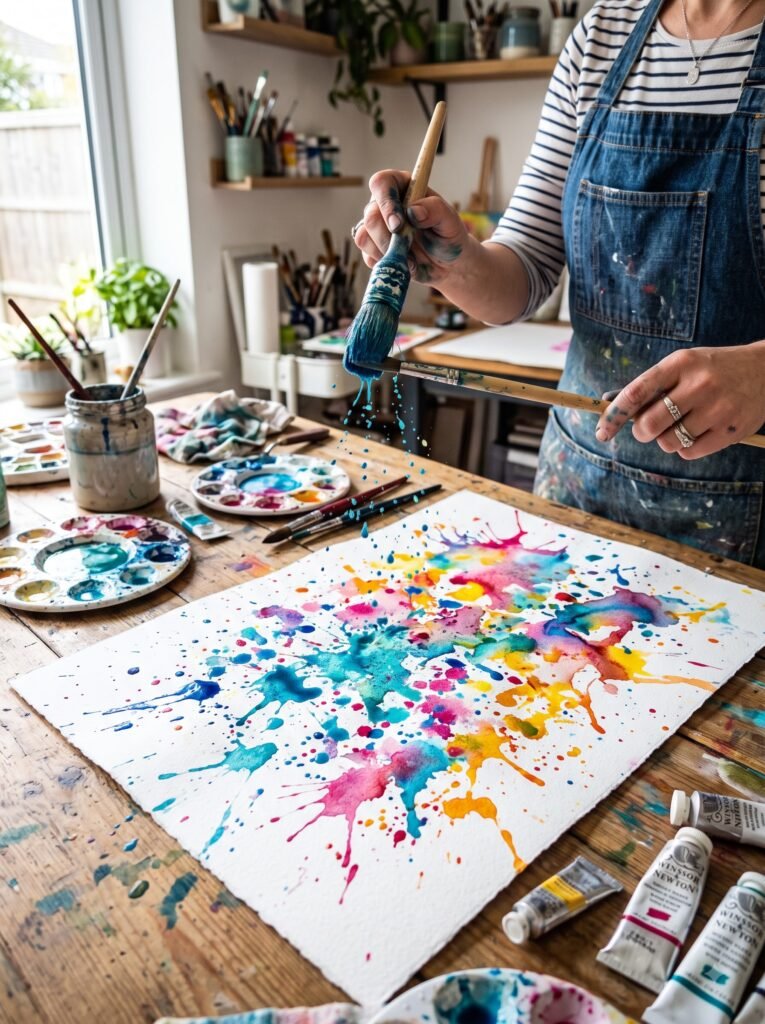
Load a paintbrush with diluted watercolor and flick it onto paper for an abstract, colorful splatter piece. Kids of almost any age can do this one.
Why parents love it: It’s low-pressure — there’s no “wrong” way to do it, which takes the perfectionism out of art time.
When it works best: As a group activity with siblings, since everyone can work on their own piece at once.
Implementation tips: Lay down a drop cloth or work outside, because splatter technique means splatter everywhere.
Safety consideration: Choose non-toxic, washable watercolors labeled safe for kids.
17. DIY Cork Board Map With Pins
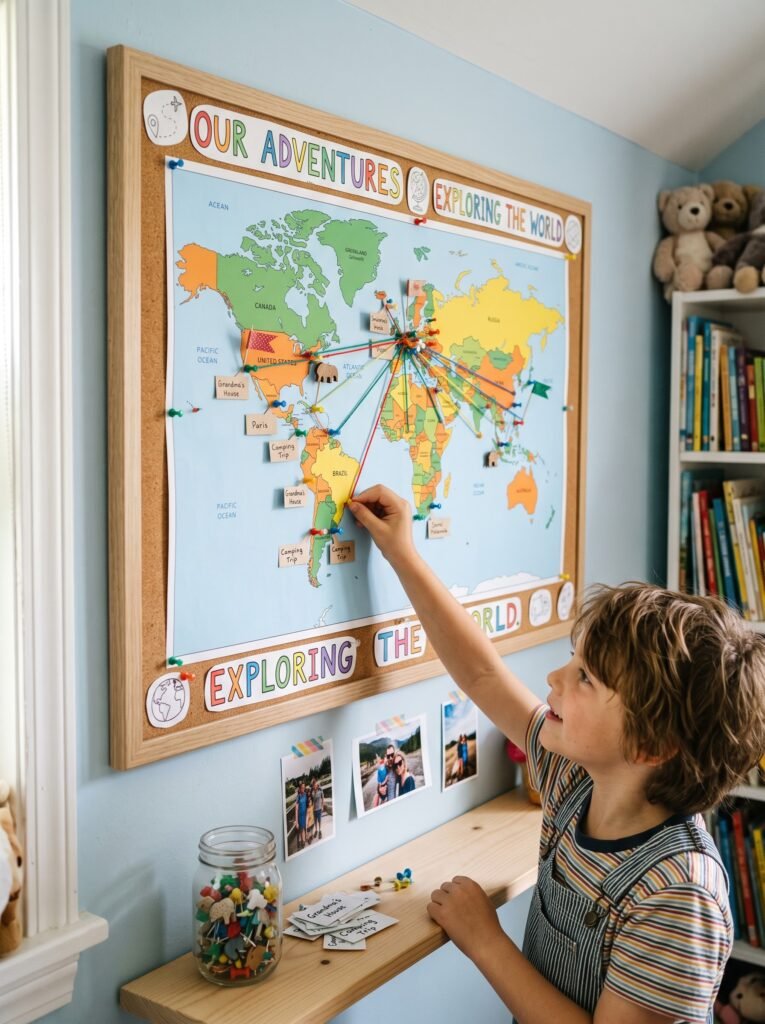
Cover a large cork board with a world map print and use colorful pins to mark places you’ve visited or dream of visiting as a family.
Why parents love it: It’s educational and interactive — kids genuinely enjoy adding new pins.
When it works best: Big-kid or tween rooms, playrooms, or even a shared family hallway.
Implementation tips: Laminate the map before mounting so pin holes don’t tear the paper over time.
Safety consideration: Use rounded push pins and mount the board higher up if younger siblings are around.
18. DIY Painted Canvas Initial Art
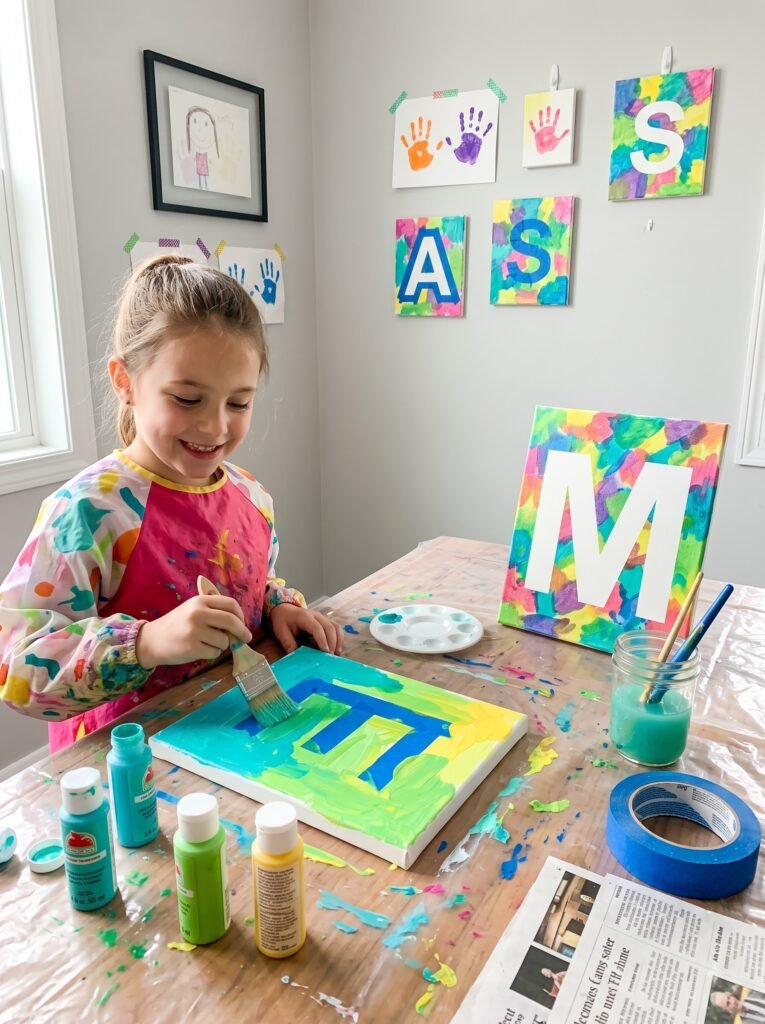
A single oversized letter — your child’s first initial — painted or collaged onto canvas makes a simple, elegant statement piece.
Why parents love it: It’s minimal effort for maximum visual impact.
When it works best: Above a bed or dresser as a focal point.
Implementation tips: Print a giant outline of the letter, trace it lightly onto canvas, then paint or decoupage within the lines.
Budget-friendly alternative: Use a large sticker letter directly on a plain painted canvas instead of freehand painting.
19. DIY Sponge-Painted Tree Art
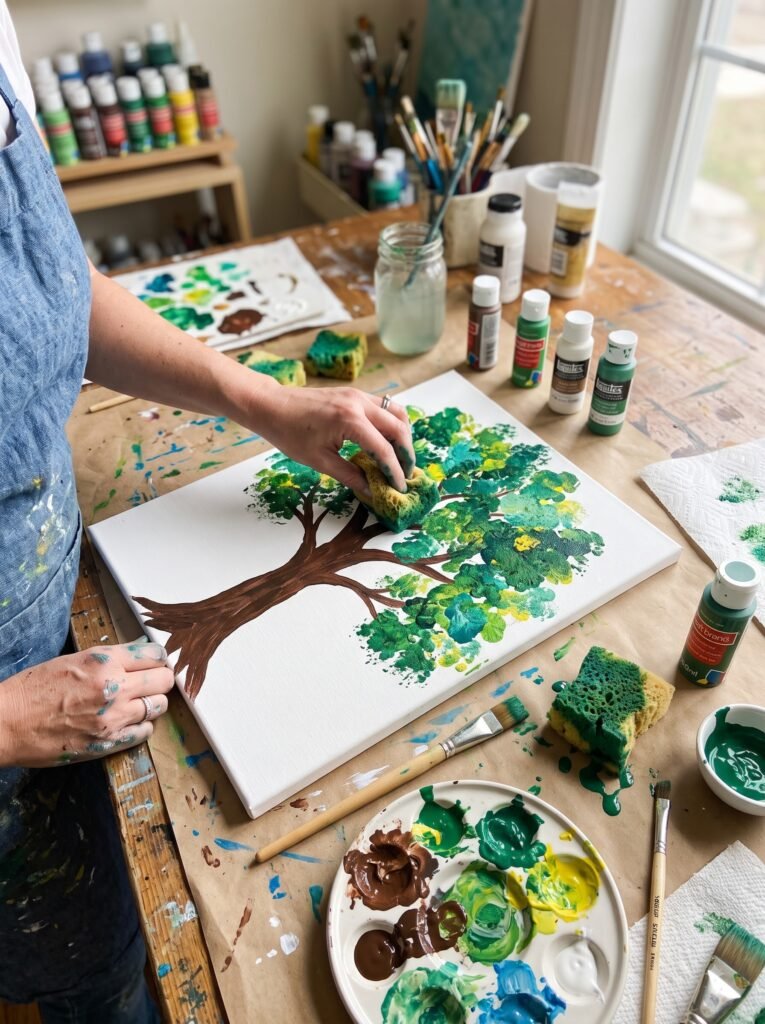
Trace a simple tree trunk and branches on canvas, then let kids sponge-paint colorful “leaves” using dabbed paint in various colors.
Why parents love it: It’s a beautiful way to track growth — add a new leaf print every birthday.
When it works best: Nurseries or playrooms as a long-term, evolving art piece.
Implementation tips: Use a pre-cut sponge shape or even a cut potato for a clean, consistent leaf print.
Common mistake to avoid: Overloading the sponge with paint, which causes blobby, undefined shapes.
20. DIY String Art Shapes
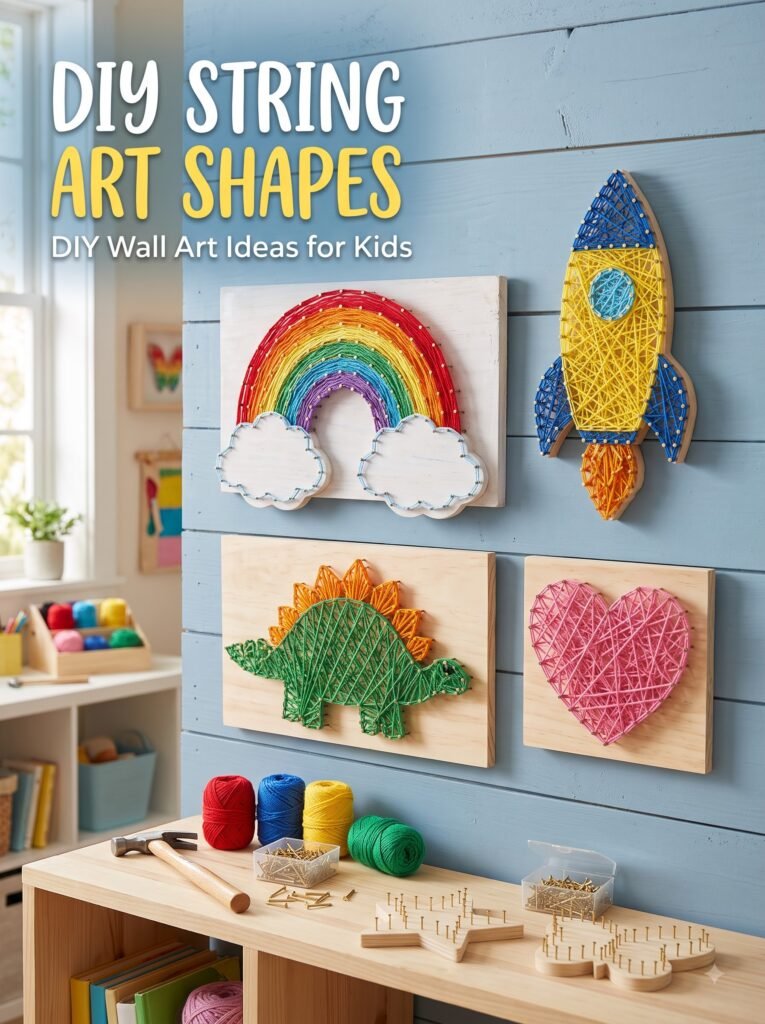
Hammer small nails into a wood board in the outline of a simple shape (a heart, star, or cloud), then wrap colorful string between them.
Why parents love it: It looks impressively intricate but is genuinely simple once the nails are in place.
When it works best: A parent-led project for younger kids, or a solo project for tweens who want something more advanced.
Safety consideration: Adults should handle the hammering step; kids can take over once the nails are secure.
Budget-friendly alternative: Use a corkboard instead of wood so nails push in by hand — no hammer needed.
21. DIY Painted Rock Art Display
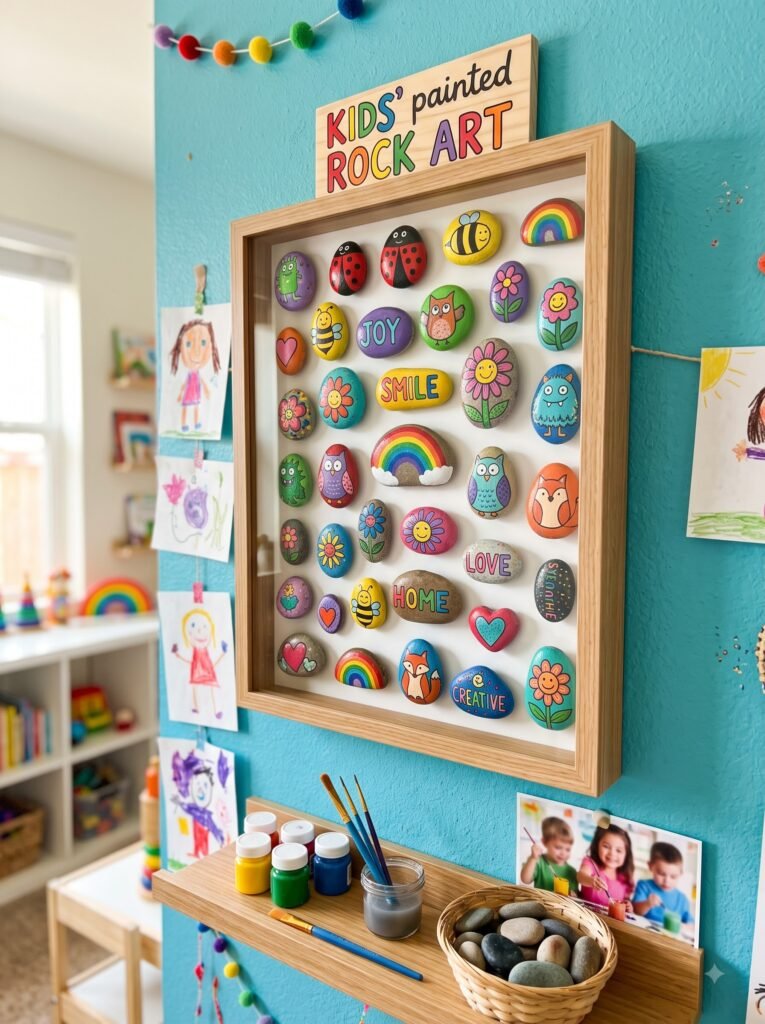
Paint small rocks with patterns, animals, or characters, then arrange them in a shadow box or on a floating shelf as three-dimensional wall art.
Why parents love it: It’s a screen-free activity kids can return to again and again, adding new rocks over time.
When it works best: After a nature walk or beach trip when you’ve already got a rock collection going.
Implementation tips: Seal painted rocks with clear varnish so colors stay vibrant.
Quick Tip: Hot glue rocks directly onto a canvas for a permanent, no-shelf version.
22. DIY Photo Booth Strip Wall Display
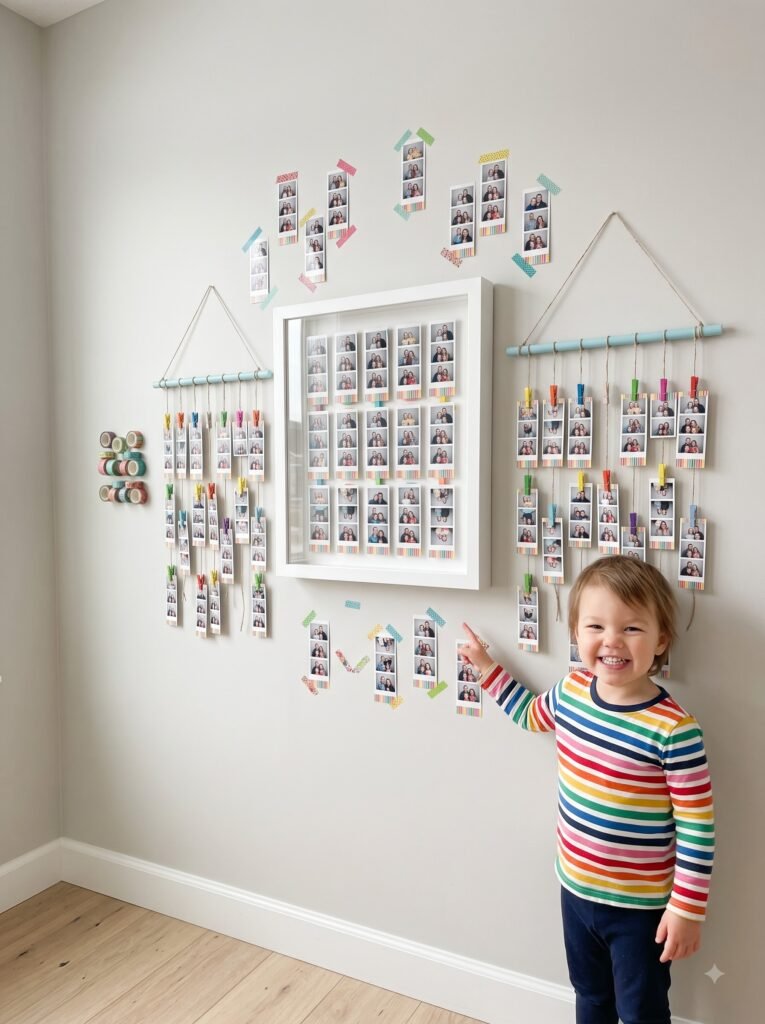
Print favorite candid family photos in a vertical photo-booth strip style and clip them to a wire or string across the wall.
Why parents love it: It’s casual, fun, and easy to update whenever you have new favorite photos.
When it works best: Playrooms or a kid’s reading nook.
Implementation tips: Use small wooden clothespins to attach photos — kids can help rearrange them anytime.
Budget-friendly alternative: Print photos at home in black and white for a cohesive look at a fraction of the cost.
23. DIY Painted Canvas Rainbow Arch
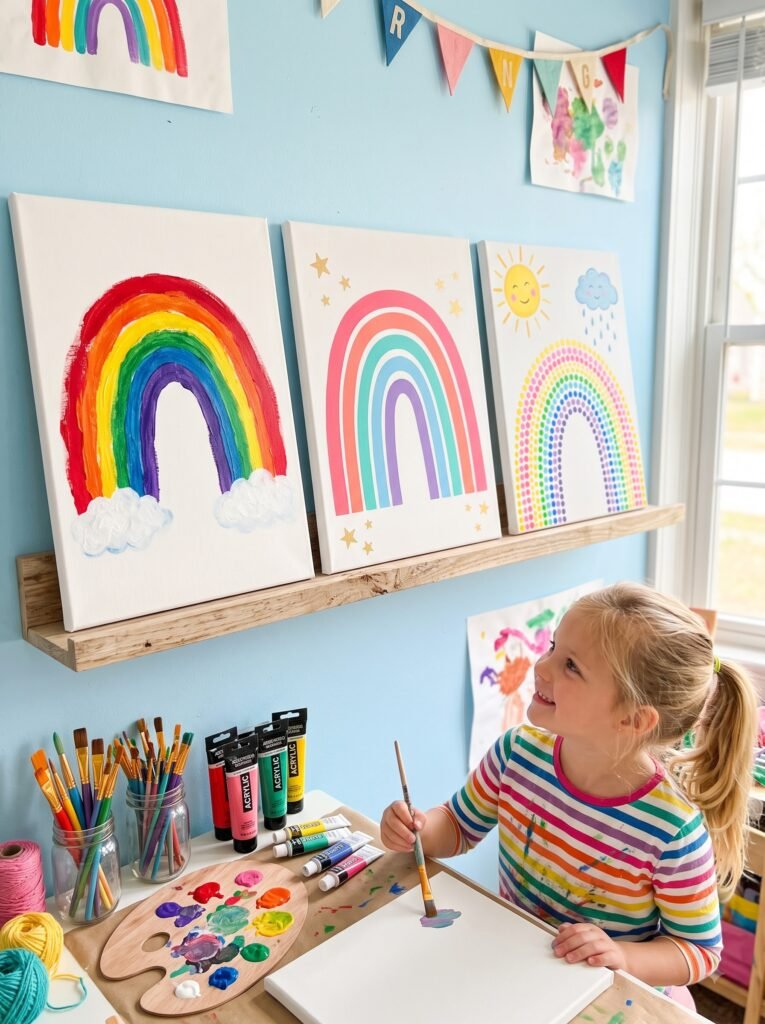
Paint simple curved rainbow stripes on a square canvas for cheerful, modern nursery art that fits nearly any color scheme.
Why parents love it: Rainbow decor is timeless and works for any gender or age.
When it works best: Nurseries and toddler rooms as a centerpiece above the crib.
Implementation tips: Use painter’s tape to create crisp, clean arch lines before filling in color.
Common mistake to avoid: Removing the tape before the paint fully dries, which can smudge the crisp edges.
24. DIY Button Art Flowers
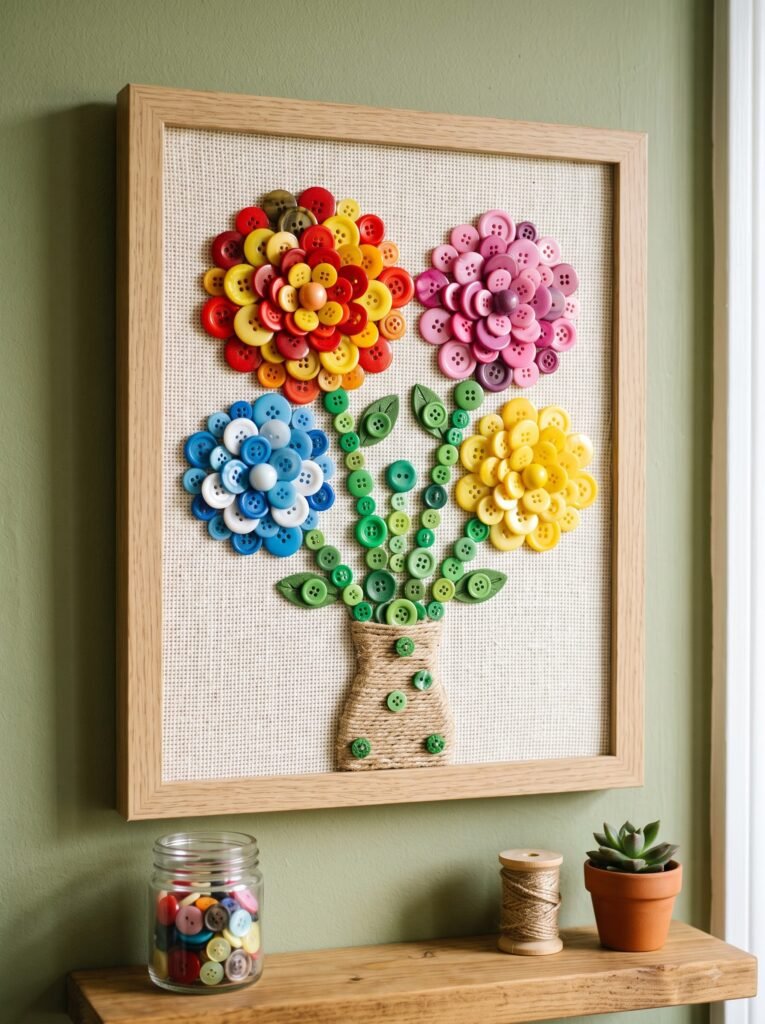
Glue colorful buttons onto canvas in flower shapes with painted or pipe-cleaner stems for a textured, tactile piece.
Why parents love it: Sorting and placing buttons is a great fine-motor activity for preschoolers.
When it works best: A rainy-day project using a button stash you already have at home.
Safety consideration: Best for kids past the choking-hazard age (generally 4+) since small buttons are involved.
Budget-friendly alternative: Use dried pasta shapes instead of buttons, spray-painted in bright colors.
25. DIY Custom Name Bunting Banner
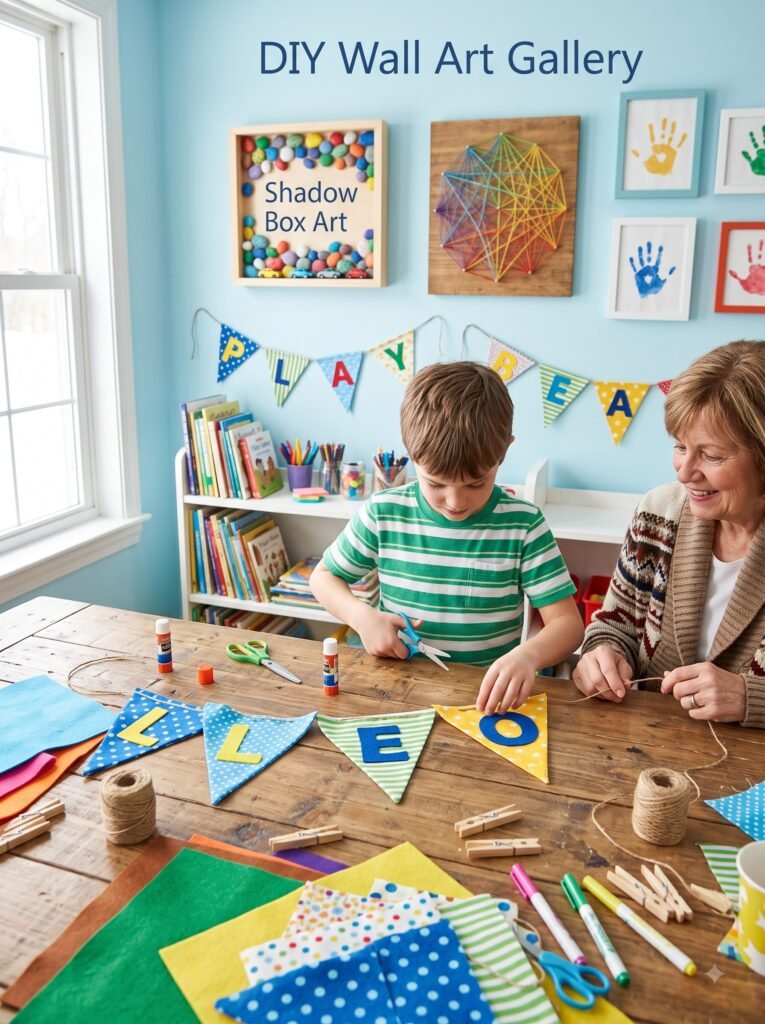
Sew or glue felt triangles, one letter per flag, spelling out your child’s name, and string them across the wall.
Why parents love it: It’s festive, personalized, and doubles as a party decoration for birthdays too.
When it works best: Above a bed, crib, or reading corner.
Implementation tips: Use fabric markers or iron-on letters for the easiest lettering method.
Budget-friendly alternative: Cut triangles from card stock instead of felt.
26. DIY Layered Paper Flower Wall Art
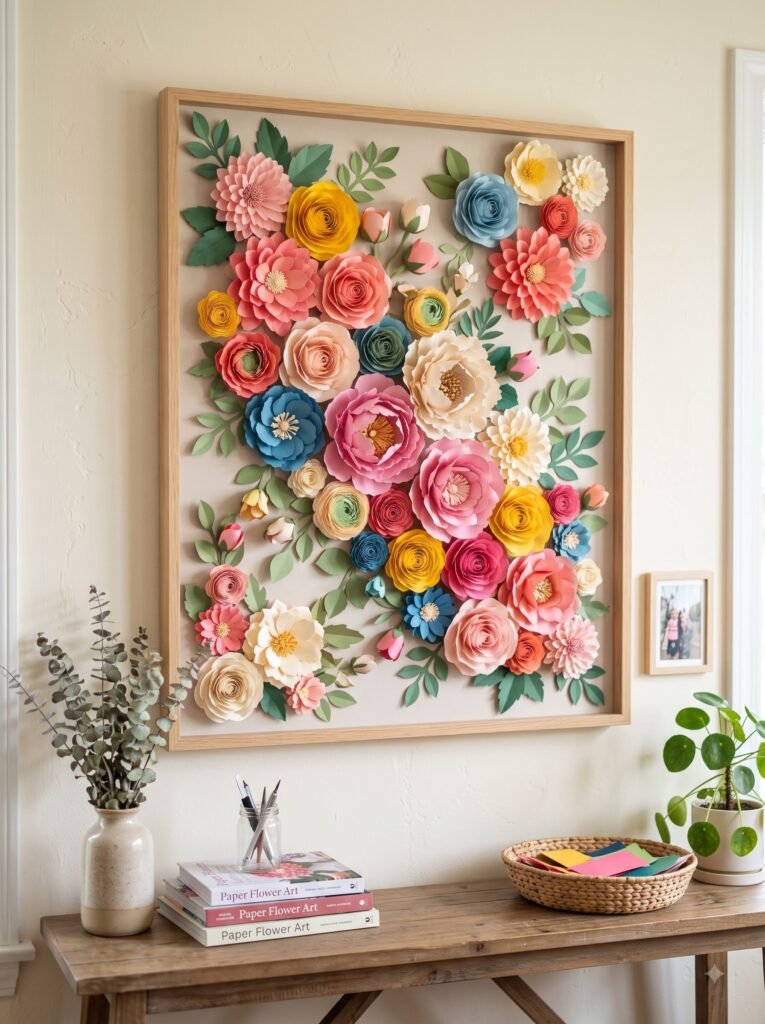
Cut and layer paper circles in graduating sizes, then curl the petal edges with a pencil for dimensional paper flowers mounted on a canvas or board.
Why parents love it: It creates serious wow-factor texture for very little cost.
When it works best: Girls’ rooms or anywhere you want a soft, garden-inspired feel.
Implementation tips: Hot glue layers from largest to smallest, curling petals slightly before attaching each layer.
Common mistake to avoid: Using paper that’s too thin — cardstock holds its shape much better than printer paper.
27. DIY Painted Wood Slice Animal Art
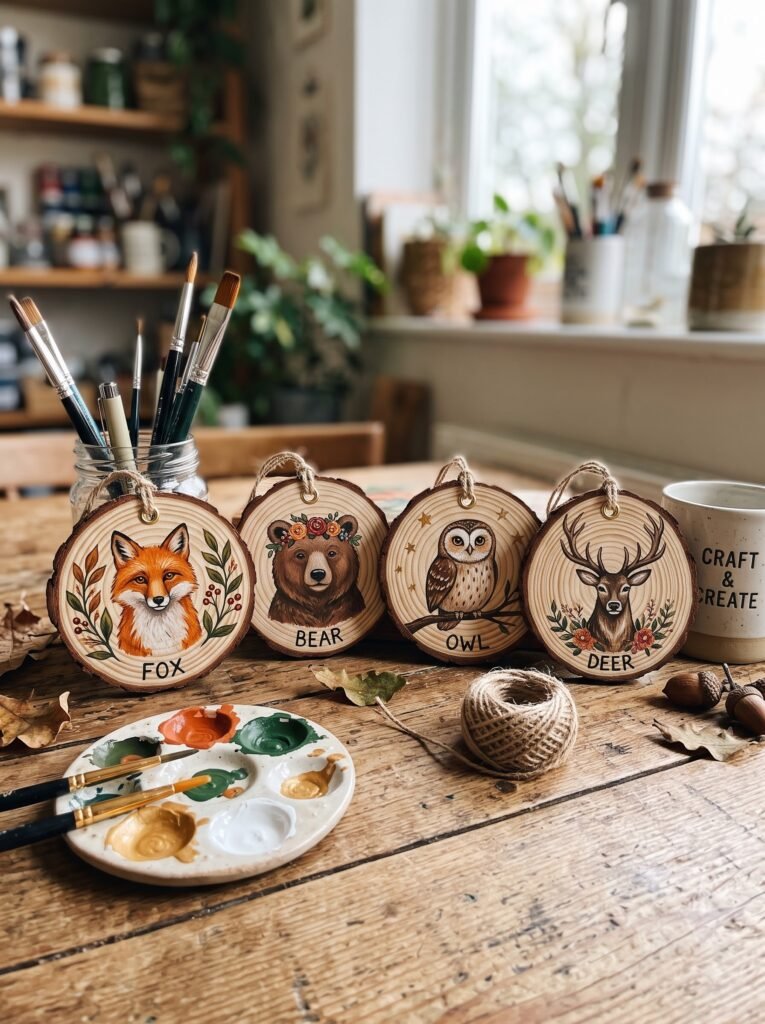
Paint simple animal faces or shapes onto wood slices (available cheap at craft stores) and hang them in a cluster.
Why parents love it: The natural wood grain adds a rustic, organic touch that pairs beautifully with woodland themes.
When it works best: Forest or safari-themed nurseries and toddler rooms.
Implementation tips: Seal with a matte varnish once painted to protect the wood and keep colors from chipping.
Budget-friendly alternative: Cut circles from cardboard and paint on a faux wood-grain background instead.
28. DIY Handprint & Footprint Family Tree
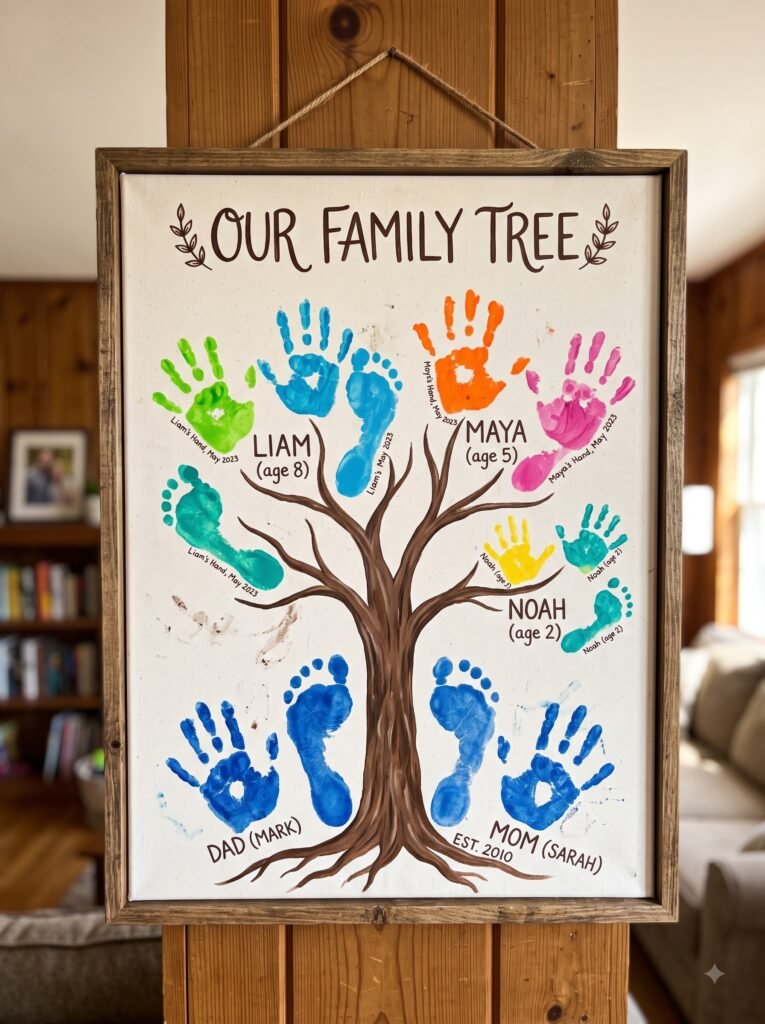
Create a tree trunk shape, then use handprints (as leaves) or footprints from each family member to fill in the branches.
Why parents love it: It’s a sentimental keepsake that includes the whole family, not just the kids.
When it works best: Living rooms, hallways, or as a special family project over a holiday weekend.
Implementation tips: Sketch the tree trunk lightly in pencil first so prints have a clear guide to follow.
Common mistake to avoid: Trying to fit everyone’s prints in one sitting — spread it out over a day so paint doesn’t dry out mid-project.
29. DIY Painted Canvas Mountain Range
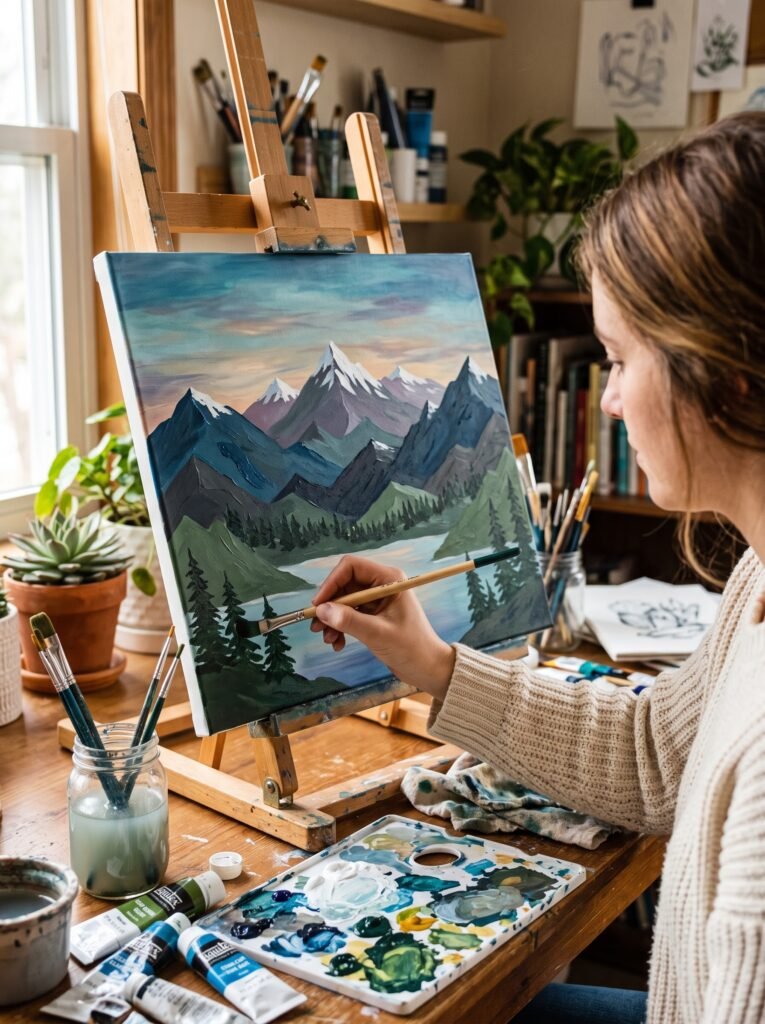
Paint simple triangular mountain shapes in an ombre or multi-color palette for a modern, gender-neutral piece.
Why parents love it: It’s trendy, easy to execute, and works in nearly any nursery color scheme.
When it works best: Above a crib or dresser as a clean, modern focal point.
Implementation tips: Use painter’s tape for crisp mountain edges, painting one color layer at a time.
Quick Tip: Add a few dot “stars” above the mountains with a fine brush for extra charm.
30. DIY Recycled Cardboard Relief Art
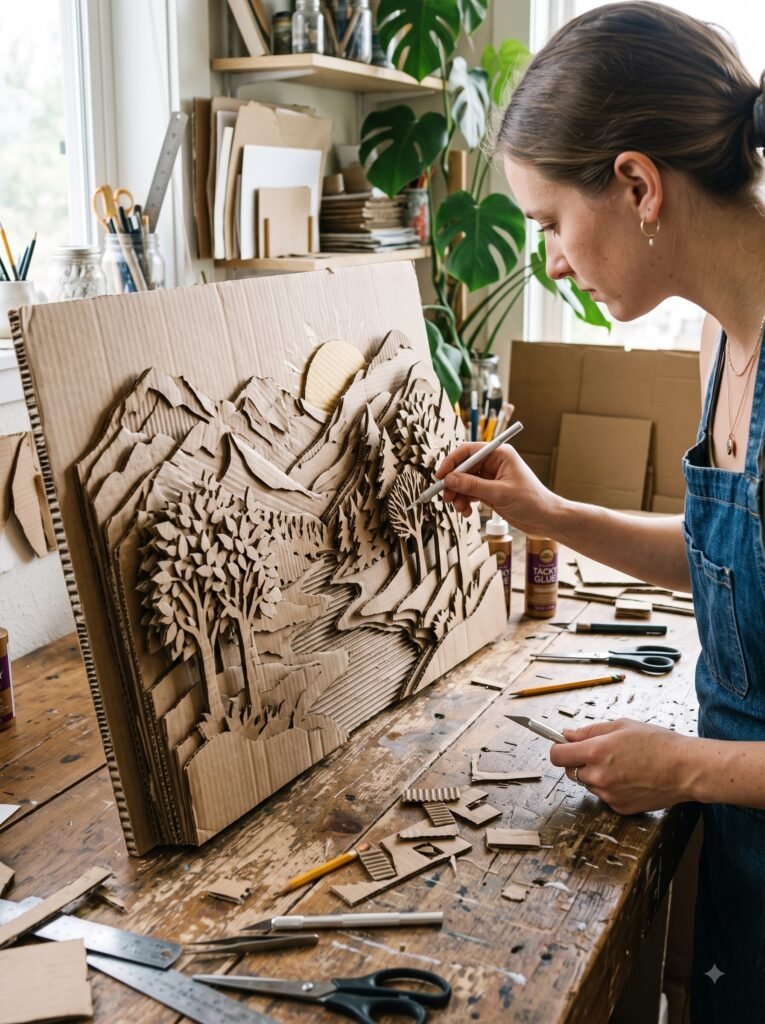
Cut shapes from cardboard, layer them for texture, and spray-paint the whole piece one color for a modern, sculptural wall art effect.
Why parents love it: It’s essentially free since it uses recycled materials, but looks surprisingly high-end.
When it works best: Tween and teen rooms with a more minimalist, modern style.
Implementation tips: Use hot glue to layer shapes before painting so everything holds together during spraying.
Safety consideration: Spray paint outdoors or in a well-ventilated space, and keep kids away during the actual spraying step.
31. DIY Embroidery Hoop Art
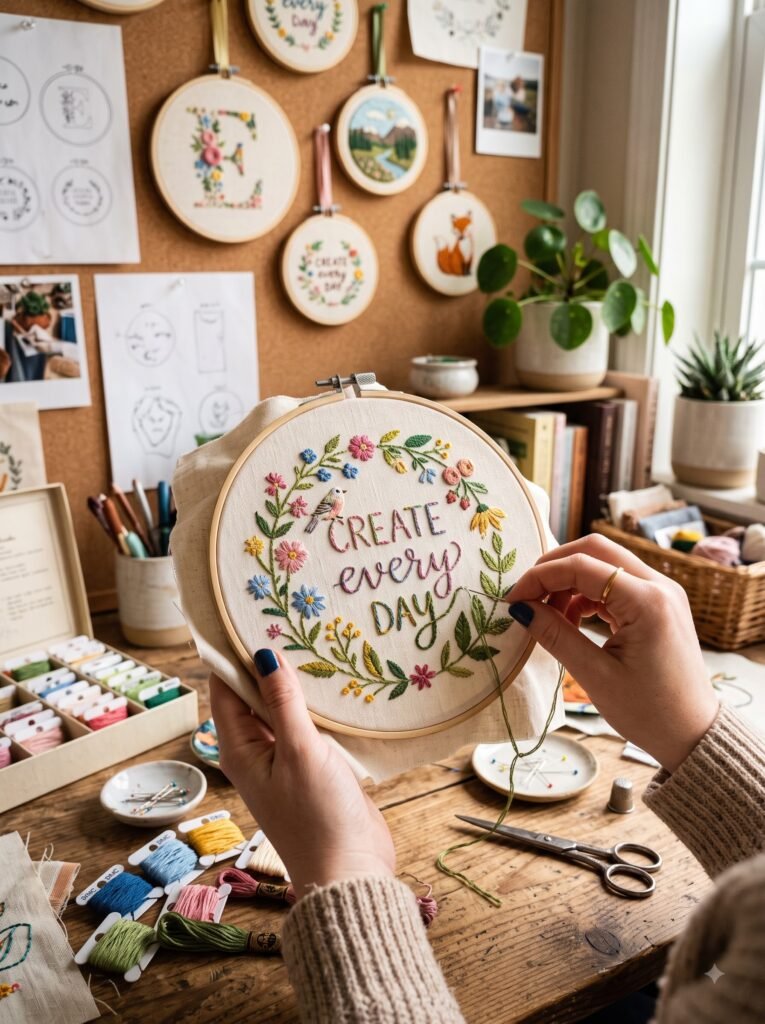
Stretch a small piece of fun fabric or a simple hand-stitched design inside an embroidery hoop for an easy, ready-to-hang piece.
Why parents love it: Embroidery hoops come with a built-in frame, so there’s no extra mounting hardware needed.
When it works best: As part of a gallery wall grouping with mixed shapes and sizes.
Implementation tips: Secure fabric between the two hoop rings, pull taut, and trim excess fabric from the back.
Budget-friendly alternative: Use scrap fabric from an old outfit or blanket for a sentimental touch.
32. DIY Sensory Textured Wall Panel
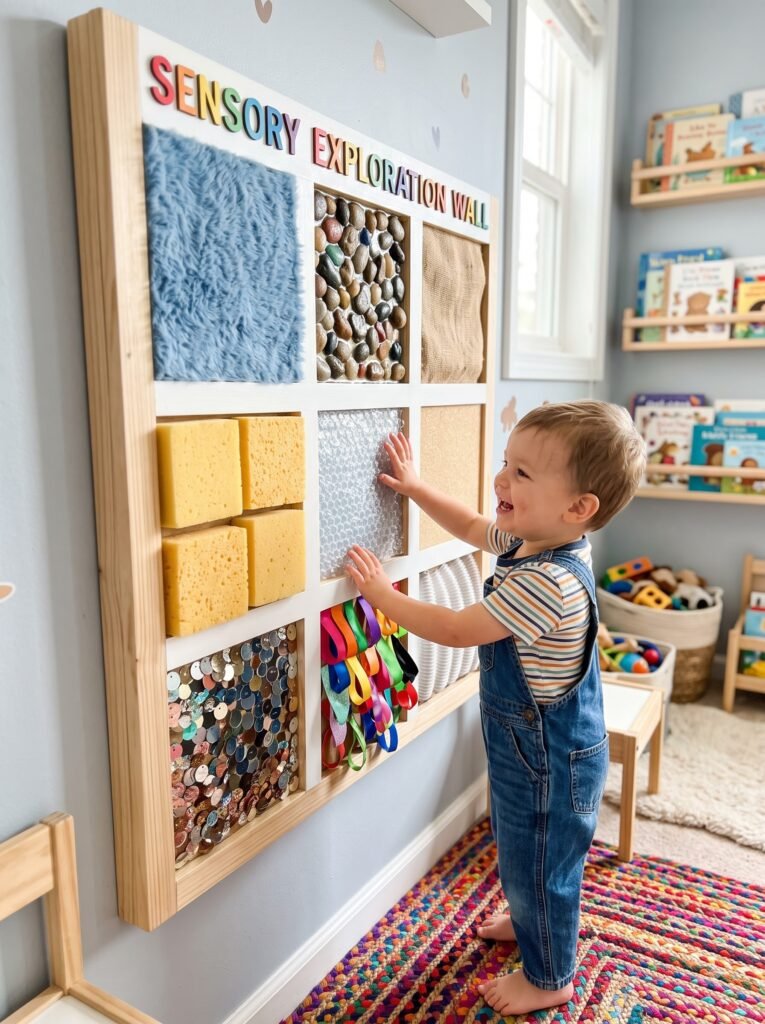
Combine different textures — pom poms, felt, bubble wrap, ribbon — onto one board for a piece that’s as much a sensory toy as it is art.
Why parents love it: It gives babies and toddlers something safe to touch and explore, right on the wall.
When it works best: Nurseries and playrooms for younger children who are still exploring through touch.
Implementation tips: Mount low enough for little hands to reach, and secure every element with strong glue so nothing pulls off easily.
Safety consideration: Avoid small, detachable pieces if your child still mouths objects.
33. DIY Painted Canvas Sun & Clouds
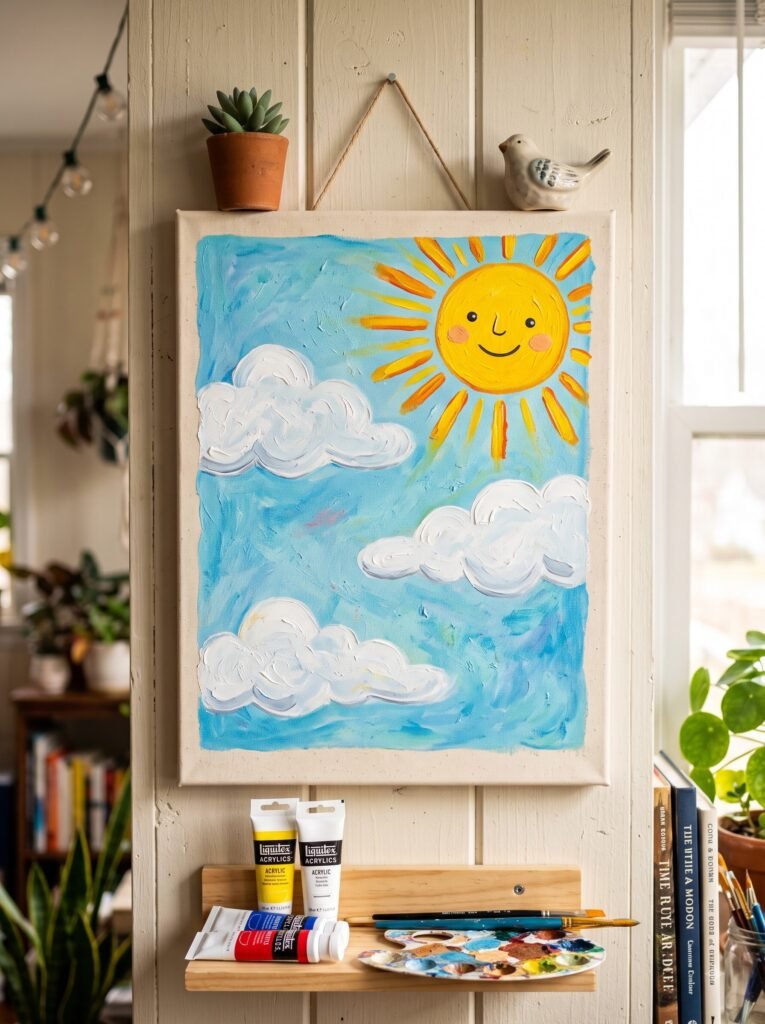
A cheerful oversized sun with a few soft clouds, painted in warm yellows and creams, makes an easy and universally appealing nursery piece.
Why parents love it: It’s simple enough for a first-time painter but still looks intentional and polished.
When it works best: Gender-neutral nurseries with warm, soft color palettes.
Implementation tips: Paint the sun freehand using a plate as a tracing guide for a perfect circle.
Common mistake to avoid: Making the clouds too crisp-edged — a slightly fluffy, uneven edge looks more natural.
34. DIY Kid-Made Abstract Canvas Series
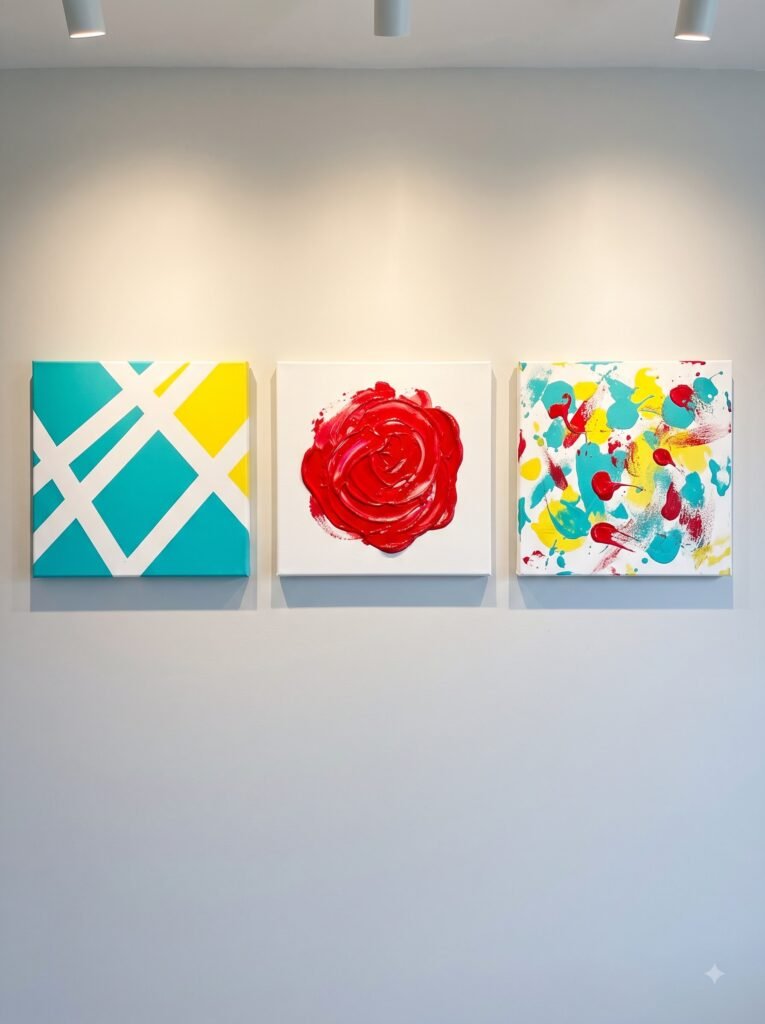
Let your child paint freely on 2–3 small canvases using just two or three coordinating colors, then hang them together as a set.
Why parents love it: It turns genuinely unedited kid creativity into something that looks curated and gallery-worthy.
When it works best: Anywhere you want the art to feel authentically “made by them,” not just a guided craft.
Implementation tips: Choose the paint colors ahead of time so the final grouping feels cohesive even though the painting itself is totally free-form.
Expert Advice: Limiting the color palette is the single easiest way to make a child’s free-painted art look intentional rather than chaotic.
35. DIY Illustrated Height Silhouette Art
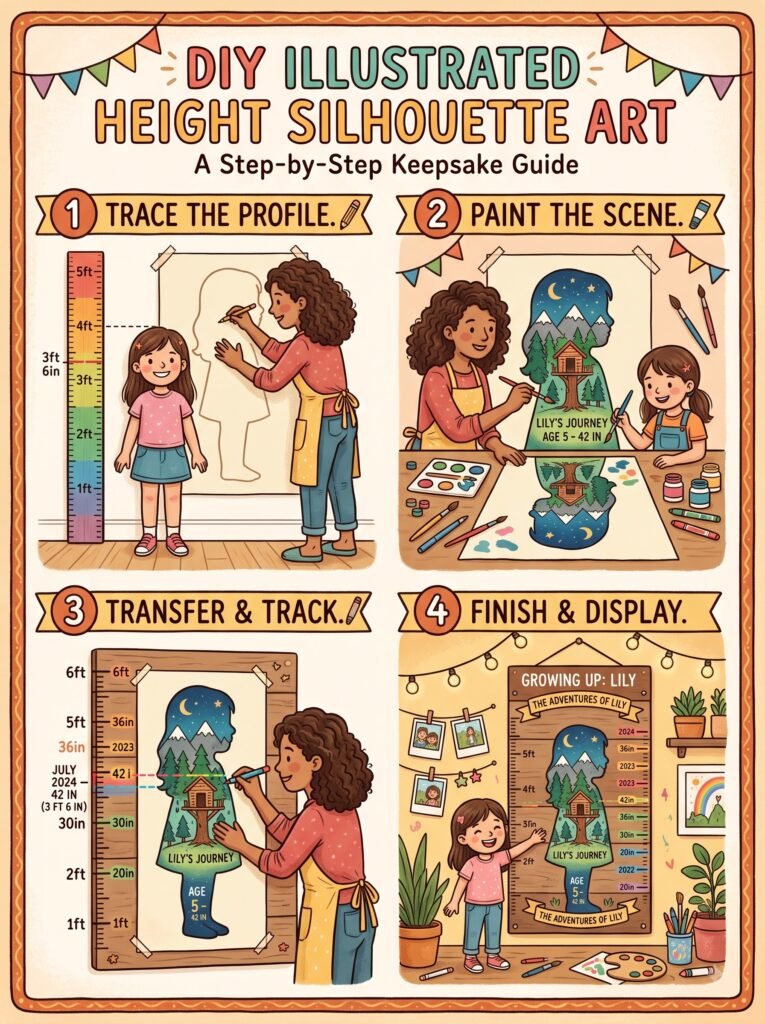
Trace your child’s silhouette (side profile) onto paper or canvas at a few different ages, then frame them together to show how much they’ve grown.
Why parents love it: It’s an unexpected, artistic way to document growth that feels more like decor than a typical growth chart.
When it works best: Hallways or a family memory wall.
Implementation tips: Use a bright lamp to cast a clean shadow, then trace the outline onto paper before cutting and mounting on contrasting card stock.
Common mistake to avoid: Waiting too long between tracings — even six months makes a noticeable, sweet difference in the silhouette.
Frequently Asked Questions
What DIY wall art is safest for a baby’s nursery?
Stick to securely mounted, lightweight pieces without small detachable parts, like painted canvases, fabric-covered panels, or felt hangings, and always anchor anything near a crib firmly to the wall.
What’s the cheapest DIY wall art idea for kids?
Torn paper collages, handprint art on cardstock, and framed kids’ drawings cost almost nothing since they use supplies most families already have at home.
How do I hang DIY art without damaging rental walls?
Use removable mounting strips, washi tape, or adhesive hooks rated for the weight of your piece instead of nails or screws.
What age can kids start helping make wall art?
Even babies can “help” with guided handprint art, while toddlers around 2–3 can manage simple painting, and kids 5+ can handle cutting, gluing, and more independent projects.
How often should I rotate kids’ wall art?
Every few months works well for artwork displays, though sentimental or growth-tracking pieces (like handprint canvases or height charts) are meant to stay up long-term.
What paint is safest for kids’ DIY projects?
Choose non-toxic, washable acrylic or tempera paint labeled specifically as child-safe, especially for anything younger kids might touch or accidentally taste.
Can DIY wall art work in small bedrooms?
Yes — smaller pieces like embroidery hoop art, framed prints, or a mini gallery wall actually work better in tight spaces than one oversized canvas.
How do I make DIY art match my existing room decor?
Pull 2–3 colors directly from your bedding, curtains, or rug and use only those shades across your art pieces for an instantly coordinated look.
What’s a good DIY wall art project for siblings to do together?
Watercolor splatter art or a shared handprint family tree work well since multiple kids can contribute to one piece without needing identical skill levels.
Do I need expensive supplies to get started?
Not at all — many of the ideas above use things you likely already have, like cardboard, paper, buttons, or leftover paint samples.
Final Thoughts
From five-minute handprint canvases to weekend embroidery hoop projects, these DIY wall art ideas for kids prove that you don’t need a big budget or advanced craft skills to create a room that feels special. The best projects are usually the simplest ones — a rainbow arch, a torn-paper collage, a cluster of framed drawings — because they’re the ones you’ll actually finish.
Pick two or three ideas that fit your family’s style, your budget, and how much mess you’re up for this week, and start there. You can always add more later.
Whatever you choose, remember that the goal isn’t perfection — it’s creating a space your child feels genuinely at home in, filled with color, memories, and maybe a few paint splatters along the way.