
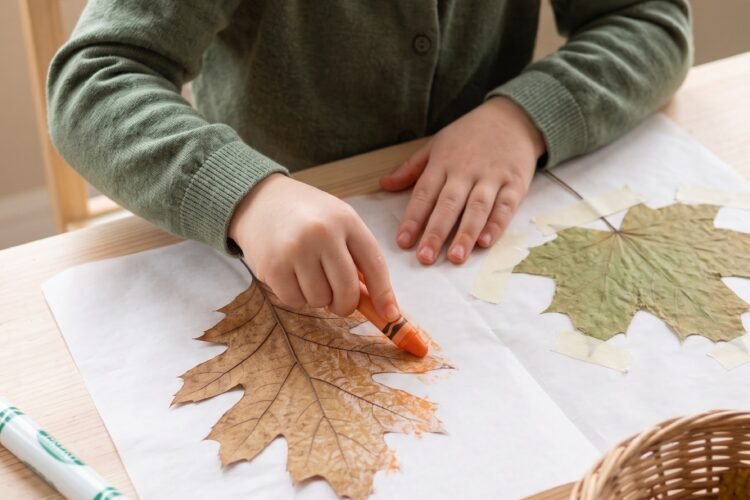
Why Real Leaves Make the Best Fall Crafts
A fake leaf is fine. A real leaf is a tiny adventure.
When preschoolers pick up an oak leaf, hold a maple leaf up to the light, or feel the fuzzy underside of a beech leaf, they’re not just doing crafts — they’re meeting autumn face to face. Real leaves bring textures, smells, and color variations that no craft store can copy. Two maple leaves from the same tree can look almost nothing alike, and that’s exactly the magic you want your preschooler to notice.
Beyond the look, real leaves invite conversation. Why is this leaf curled? Why is that one spotted? Why are some red and some still green? A leaf craft becomes a science moment, a sensory moment, and a memory-making moment — all without you needing to plan any of it.
You don’t need a craft studio, a Pinterest-perfect table, or a long afternoon. You need a paper bag, a slow walk outside, and a few honest supplies. The rest just grows from there — like the leaves themselves.
🌿 How to Prepare Real Leaves Safely
A little prep keeps your preschooler’s craft session mess-light, calm, and, most importantly, safe.
Forage Thoughtfully
Pick a small mix of shapes — a maple, an oak, a heart-shaped aspen, an oval beech. Avoid any leaf you can’t identify. If you spot three leaflets with a red spot where the side leaflets meet the stem, leave it alone (that’s poison ivy, and even a brush against it can cause a skin reaction).
Clean and Press
Wipe leaves gently with a barely damp cloth to remove dirt. Press them flat between book pages for a few days, or press them quickly between wax paper with a warm iron (no steam, high heat, with a cloth on top to protect the wax). Either method keeps them flat for craft day.
Soften with Glycerin (Optional)
For leaves you want to bend, drape, or use in 3D crafts like crowns or lanterns, soak them in 1 part vegetable glycerin to 2 parts warm water for 2–3 days. They’ll come out soft, supple, and noticeably more vibrant.
Handle Wisely
Real leaves can flake, crumble, or carry pollen. Keep a broom and damp cloth nearby. If your child has plant allergies, wear gloves during prep and shift to laminated or contact-paper crafts instead.
Store the Extras
Put leftover pressed leaves in a labeled envelope between parchment sheets. They’ll stay flat and ready for the next rainy afternoon.
25 Creative Leaf Crafts for Preschoolers
Each craft below is original, tested-friendly, and tuned to small hands, short attention spans, and real leaves — no plastic faux-leaf substitutes.
Craft 1: Wax Paper Pressed Leaf Garland
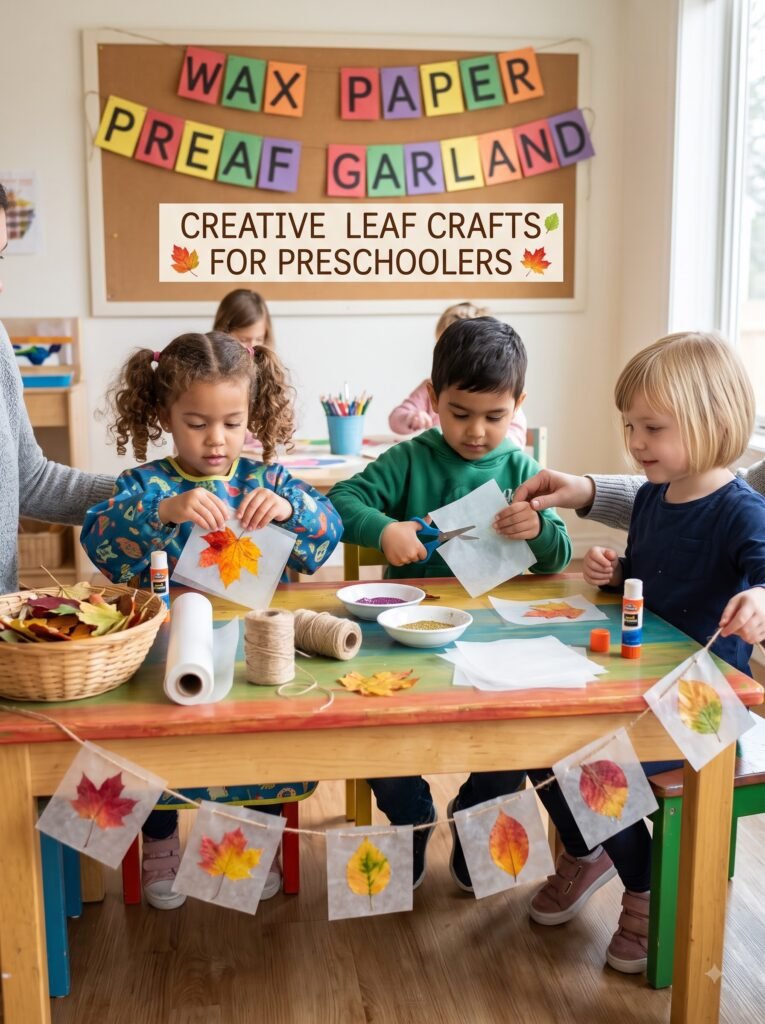
- Why it works: The wax seals the leaf inside a stained-glass-like panel, and preschoolers love seeing the leaf glowing on a sunny window.
- How to make it: Lay a pressed leaf between two sheets of wax paper. Cover with a thin cloth. Iron on high (no steam) for 5–8 seconds. Cut into a leaf or rectangle shape. Tape to a string as a garland.
- Age range: 3–5 years.
- Mess/time level: Low / 15 minutes.
- Skill benefit: Fine motor, sequencing.
- Optional twist: Let kids pick the order of colors on the garland.
Craft 2: Glycerin Leaf Crown

- Why it works: Softened leaves bend without snapping, so preschoolers can wear their art proudly.
- How to make it: Use glycerin-softened leaves (1 part glycerin to 2 parts water, soaked 2–3 days). Twist a strip of cardstock into a circle to fit your child’s head. Hot-glue or tape leaves around the band.
- Age range: 4–5 years.
- Mess/time level: Medium / 30 minutes + soak time.
- Skill benefit: Self-expression, pattern awareness.
- Optional twist: Add felt berries or tiny pinecones between leaves.
Craft 3: Leaf-Rubbing Texture Book
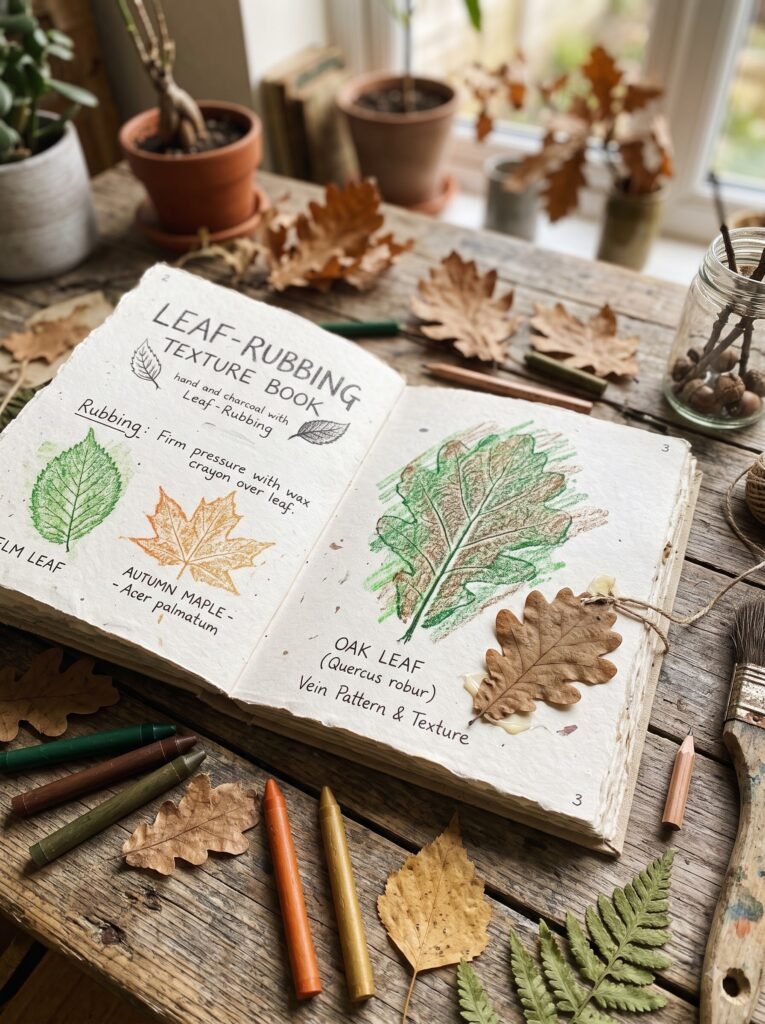
- Why it works: Rubbings turn a leaf’s veins into a fingerprint-like texture that’s deeply satisfying for small hands.
- How to make it: Place a leaf vein-side up under thin paper. Peel the paper off a crayon and rub sideways. Repeat with many leaves. Staple pages into a mini booklet.
- Age range: 3–5 years.
- Mess/time level: Low / 20 minutes.
- Skill benefit: Tactile awareness, pre-writing grip.
- Optional twist: Add a leaf-rubbing “find the matching real leaf” page.
Craft 4: Contact Paper Suncatcher
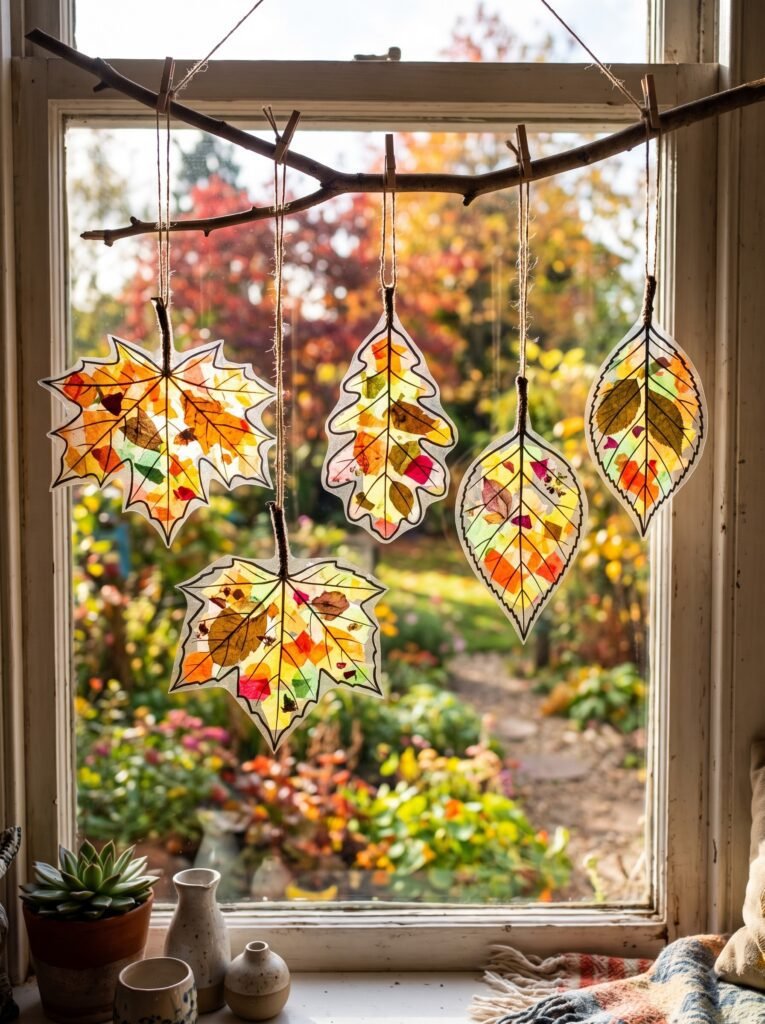
- Why it works: The sticky contact paper holds even crumbly leaves safely — no glue mess.
- How to make it: Cut two equal pieces of clear contact paper. Peel the backing off one. Lay leaves and tissue paper scraps on it. Press the second sheet on top. Trim and tape to a window.
- Age range: 3–5 years.
- Mess/time level: Low / 15 minutes.
- Skill benefit: Color sorting, gentle gluing.
- Optional twist: Add a name strip at the bottom.
Craft 5: Leaf-Stamp Painting
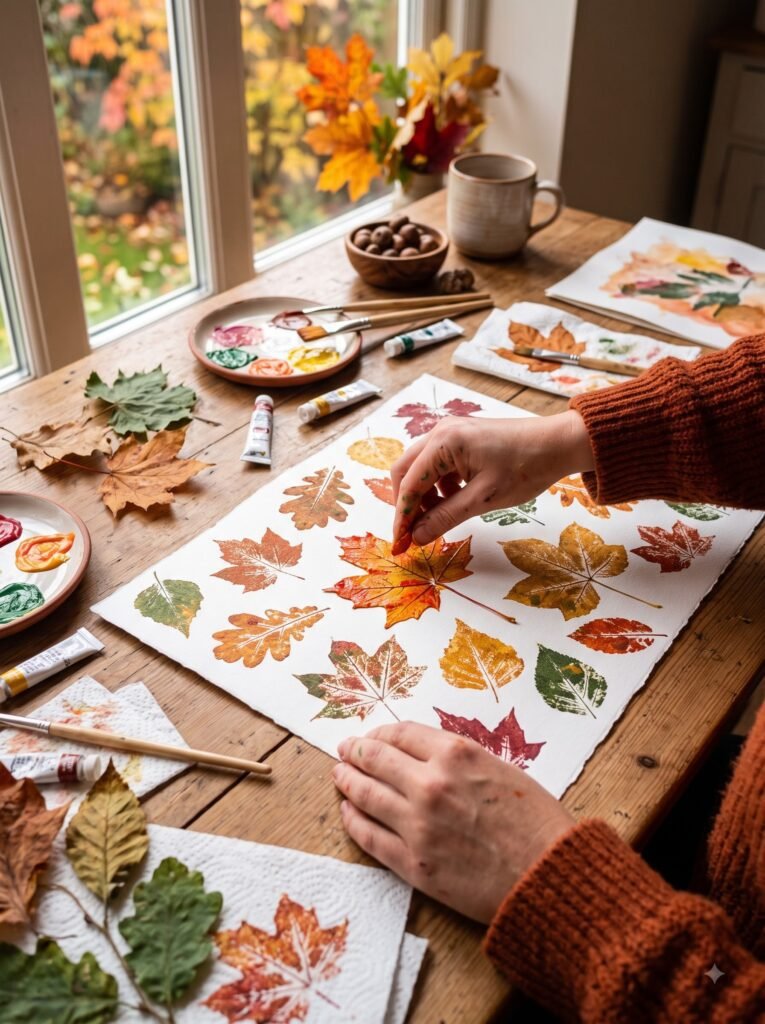
- Why it works: A painted leaf becomes a one-of-a-kind stamp — perfect for wrapping paper.
- How to make it: Brush washable tempera onto the back of a leaf. Press onto paper or a brown paper bag. Lift and repeat.
- Age range: 3–5 years.
- Mess/time level: Medium / 20 minutes.
- Skill benefit: Cause-and-effect, color mixing.
- Optional twist: Try two leaves of different shapes side by side as “leaf friends.”
Craft 6: Leaf Hedgehog Collage
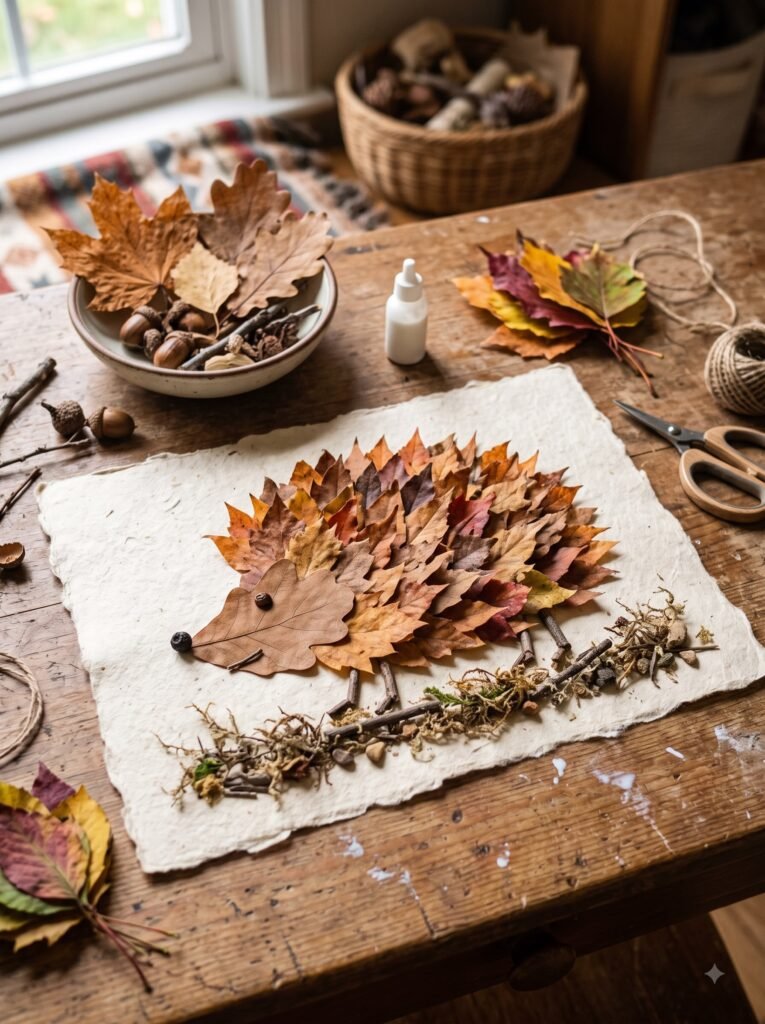
- Why it works: Turning a leaf into a hedgehog’s spines gives kids a story to tell later.
- How to make it: Draw a hedgehog face on cardstock. Glue small triangular leaf tips along the back for “spines.” Add googly eyes.
- Age range: 4–5 years.
- Mess/time level: Medium / 25 minutes.
- Skill benefit: Storytelling, gluing precision.
- Optional twist: Use acorn caps and seeds to make a tiny “forest” the hedgehog lives in.
Craft 7: Mod Podge Leaf Bowl
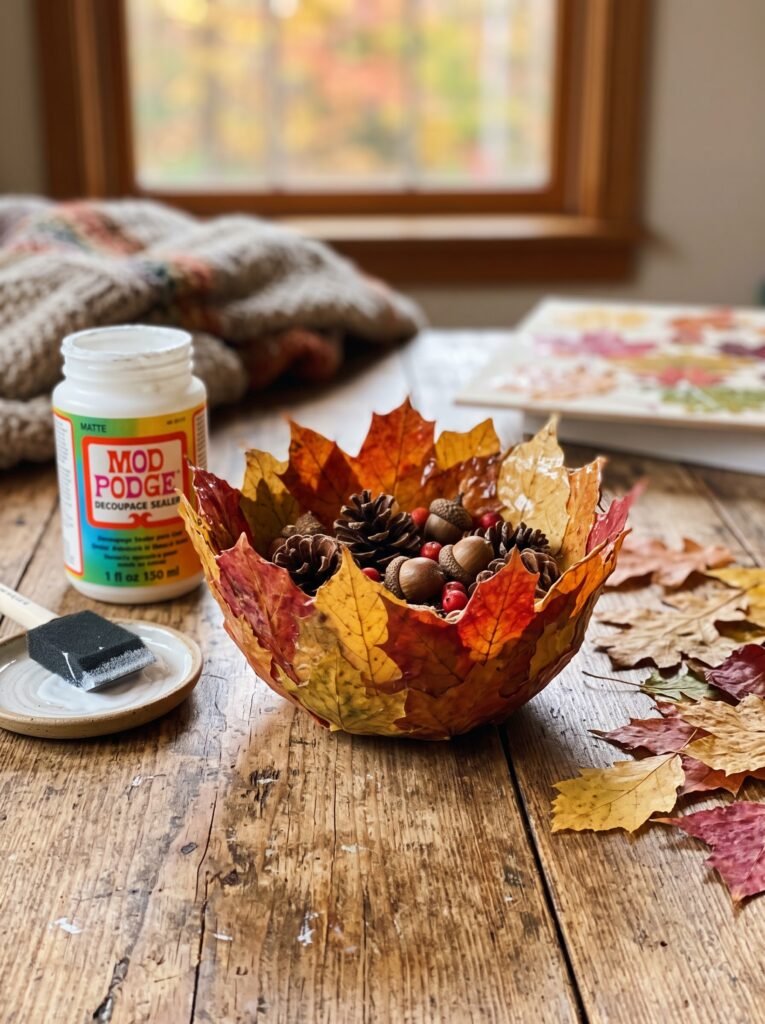
- Why it works: A leaf-covered balloon, popped and dried, becomes a tiny decorative bowl.
- How to make it: Inflate a small balloon. Layer Mod Podge and leaves onto the balloon. Let dry fully. Pop the balloon and remove. Trim edges.
- Age range: 4–5 years (adult does the popping step).
- Mess/time level: High / overnight drying.
- Skill benefit: Patience, layering.
- Optional twist: Use only red leaves for an autumn-only bowl, then fill with a tea light.
Craft 8: Real Leaf Bookmark

- Why it works: Keeps a leaf pressed and protected for years, reminding kids of the season.
- How to make it: Laminate a single pressed leaf between two strips of wide packing tape, sealing all edges. Trim with a small hole punch and add a ribbon.
- Age range: 4–5 years.
- Mess/time level: Low / 10 minutes.
- Skill benefit: Sequencing, careful handling.
- Optional twist: Make one for each family member — kids love gifting these.
Craft 9: Leaf Mandala
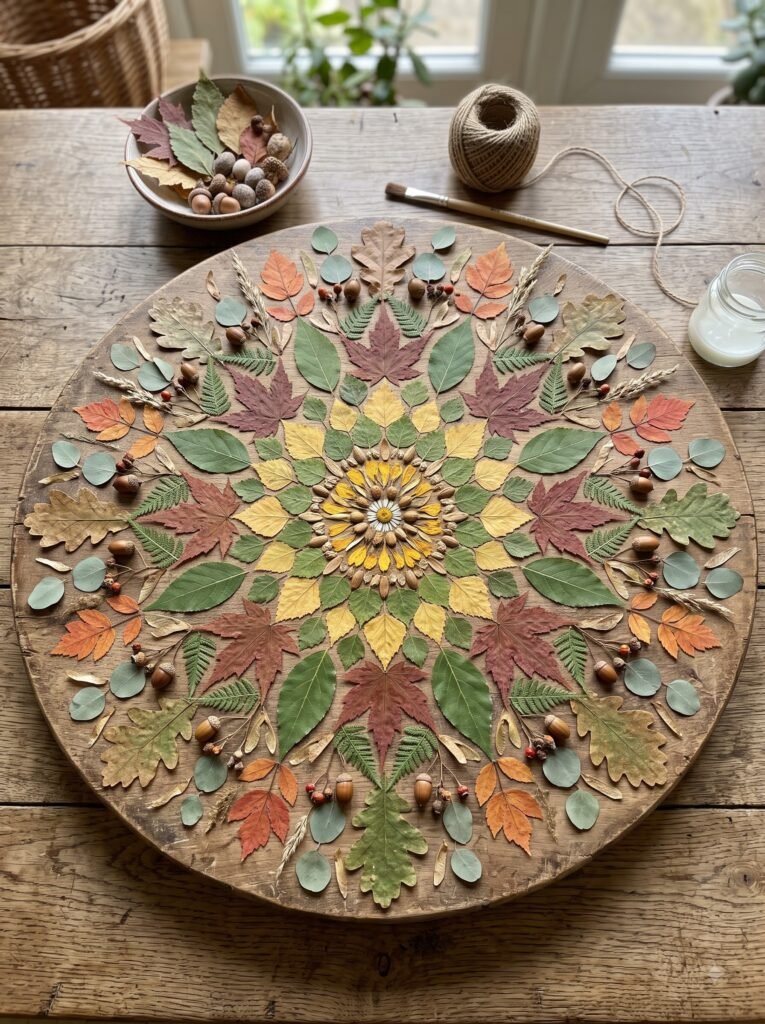
- Why it works: Repeating a leaf around a circle calms kids down — really.
- How to make it: Draw a circle on cardboard. Glue leaves in a ring, then a smaller ring, then a center. Different shapes work beautifully.
- Age range: 4–5 years.
- Mess/time level: Medium / 25 minutes.
- Skill benefit: Pattern-making, focus.
- Optional twist: Try a “color mandala” — outer leaves yellow, inner leaves red.
Craft 10: Leaf Lantern
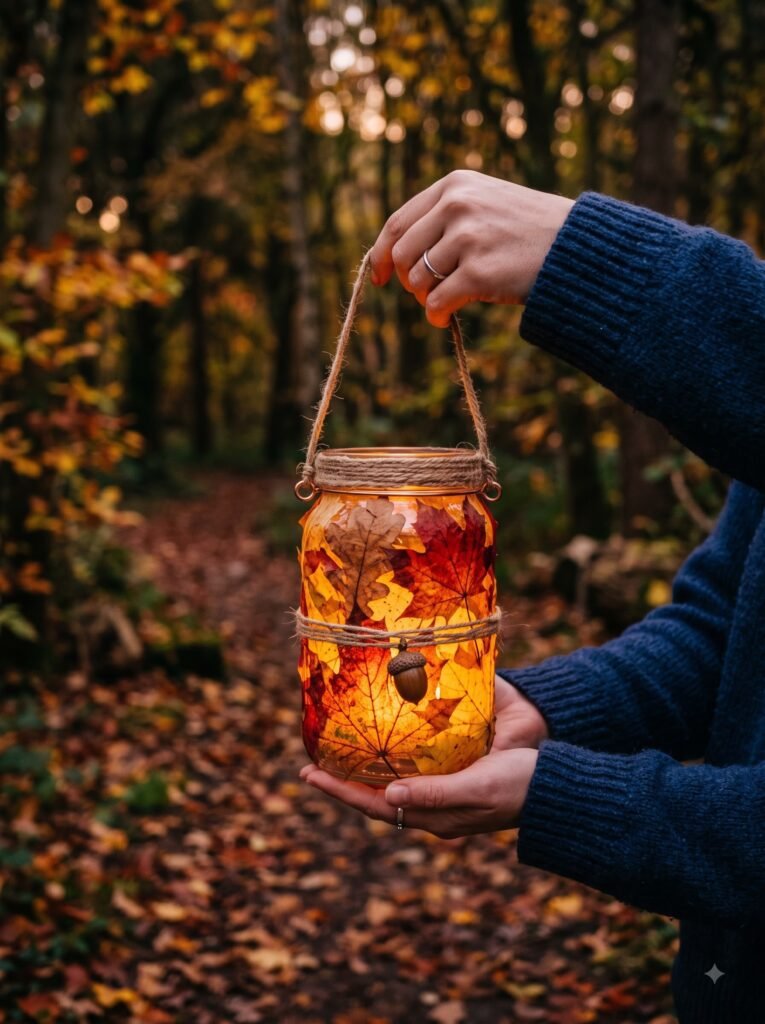
- Why it works: Soft tissue paper behind pressed leaves turns a regular jar into a glowing fall lamp.
- How to make it: Decorate a clean glass jar with Mod Podge and pressed leaves. Let dry. Drop a battery tea light inside.
- Age range: 4–5 years (lighting step is adult-only).
- Mess/time level: Medium / 30 minutes + dry time.
- Skill benefit: Decorating, color choice.
- Optional twist: Make a row of three lanterns — one red, one yellow, one green.
Craft 11: Leaf People Portraits
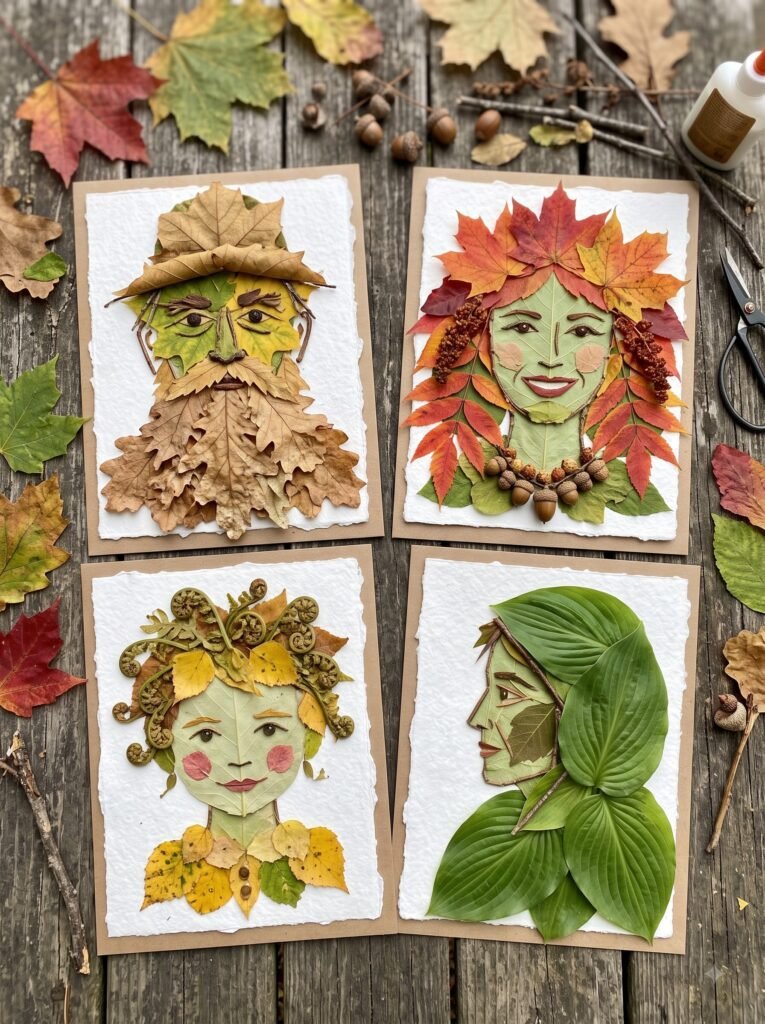
- Why it works: One leaf plus a few marker details becomes a whole character.
- How to make it: Glue a leaf on paper. Draw eyes, a smile, and tiny arms/legs around it. Name the character.
- Age range: 3–5 years.
- Mess/time level: Low / 15 minutes.
- Skill benefit: Imaginative play, drawing.
- Optional twist: Make a whole leaf-family — mom leaf, dad leaf, baby leaf.
Craft 12: Leaf-Top Felt Tree
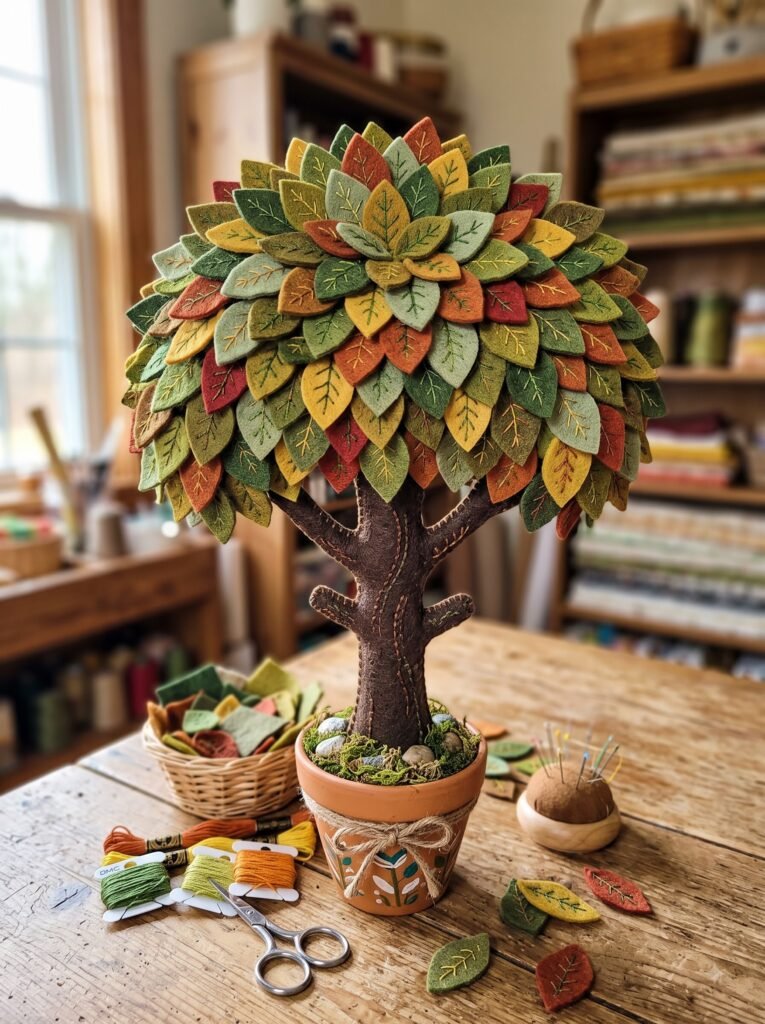
- Why it works: Soft felt with leaf “leaves” becomes a reusable autumn decoration.
- How to make it: Cut a tree trunk from brown felt. Glue pressed leaves onto the branches each season. Swap them as the year changes.
- Age range: 3–5 years.
- Mess/time level: Low / 20 minutes.
- Skill benefit: Seasonal awareness, gluing.
- Optional twist: Add a felt groundhog or acorn for a fall theme.
Craft 13: Leaf Confetti Greeting Cards
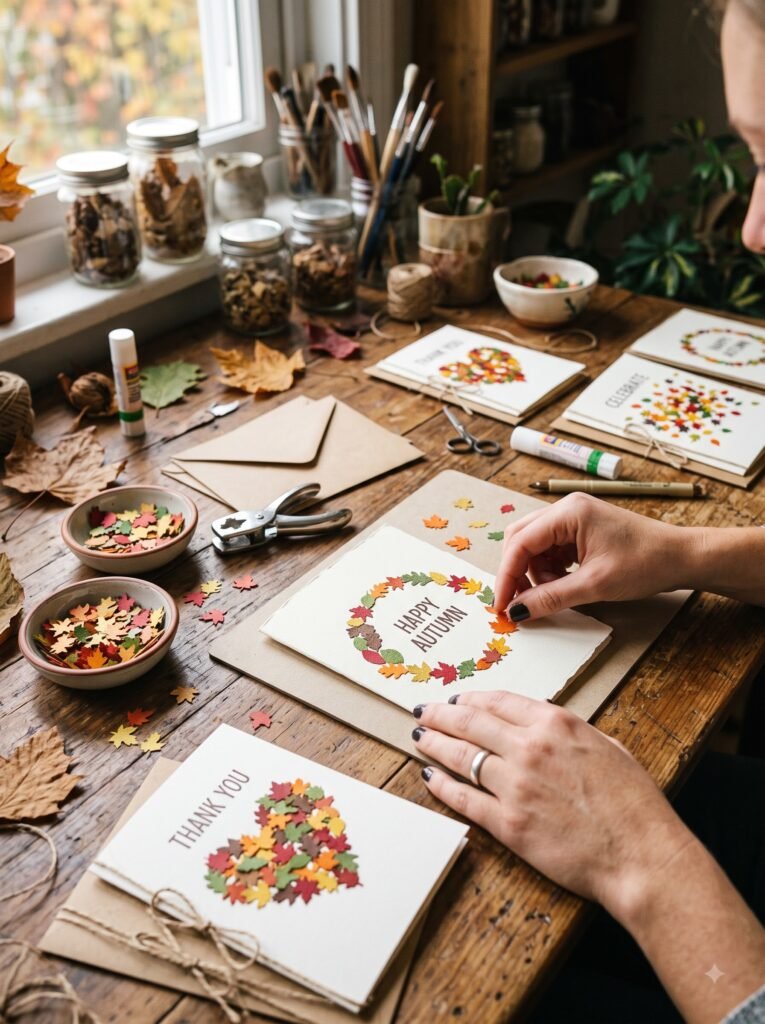
- Why it works: Tiny leaf bits on a card feel celebratory and homemade.
- How to make it: Tear pressed leaves into small bits. Glue onto folded cardstock in a heart, pumpkin, or rainbow shape.
- Age range: 3–5 years.
- Mess/time level: Low / 15 minutes.
- Skill benefit: Card design, fine motor.
- Optional twist: Use to thank a special teacher or grandparent.
Craft 14: Leaf Mobile
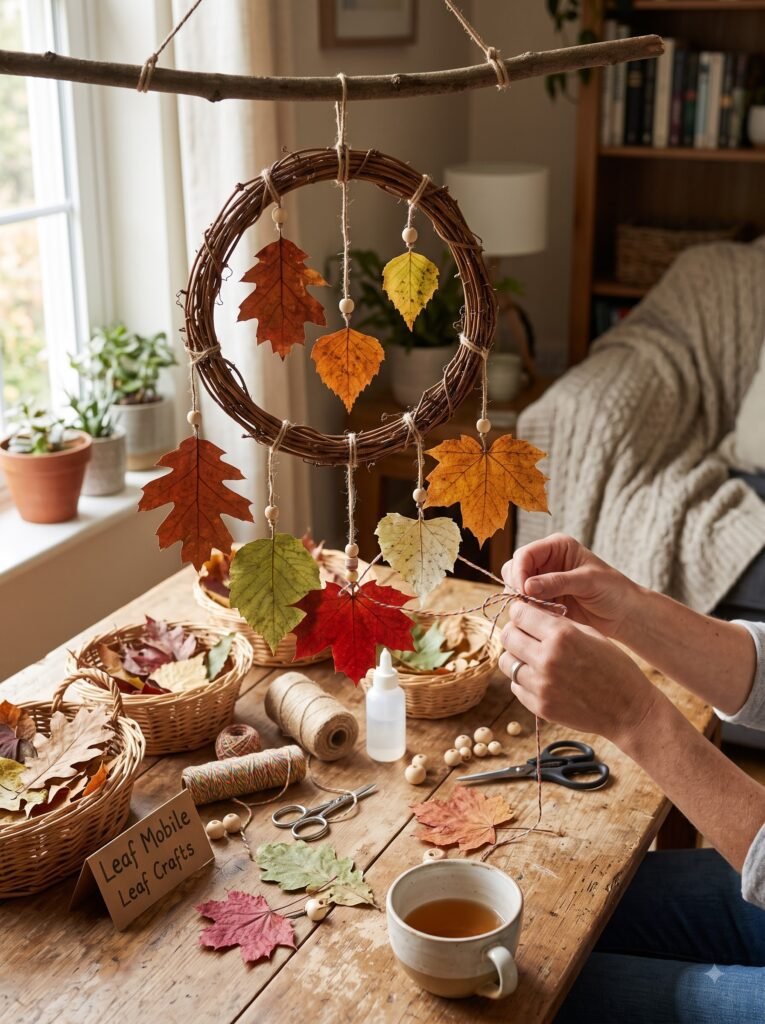
- Why it works: A swinging ceiling mobile moves with the air, and kids love watching shadows dance.
- How to make it: Tie three or four pressed leaves to yarn strands. Hang from a stick or embroidery hoop. Optionally laminate first to avoid flakes.
- Age range: 3–5 years (with adult tying).
- Mess/time level: Medium / 30 minutes.
- Skill benefit: Spatial awareness, balance.
- Optional twist: Hang near a window so breeze moves the leaves.
Craft 15: Leaf Gift Tags
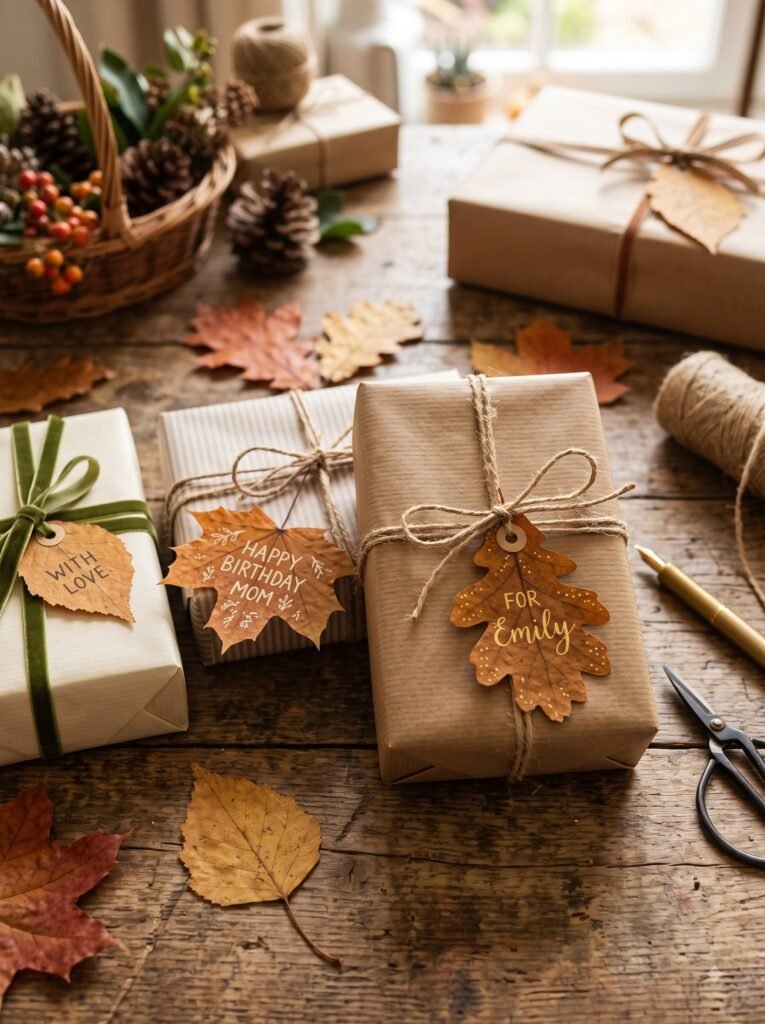
- Why it works: Real-leaf tags make any gift look thoughtful and seasonal.
- How to make it: Cut cardstock into tag shapes. Glue a mini leaf on each. Punch a hole, thread twine through.
- Age range: 4–5 years.
- Mess/time level: Low / 15 minutes.
- Skill benefit: Gift-giving, name-writing.
- Optional twist: Kids write their names on the tags themselves.
Craft 16: Leaf Sensory Bin
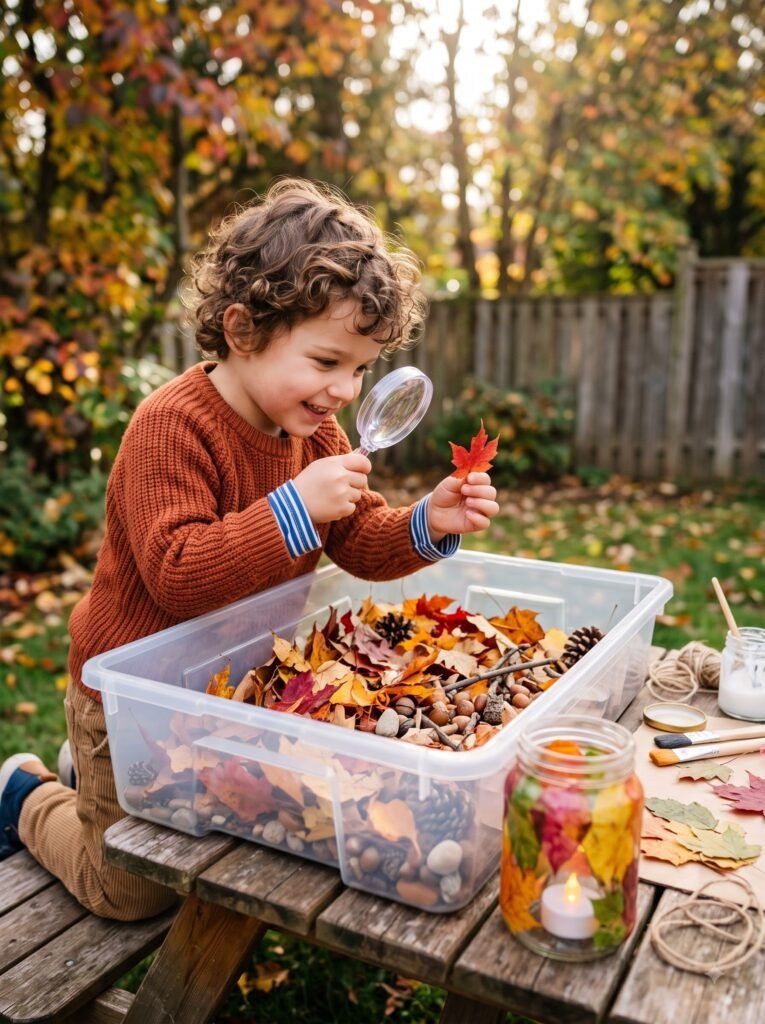
- Why it works: Mixing leaves with scoops and cups turns craft time into calm exploration.
- How to make it: Fill a shallow bin with dried leaves, acorns, pinecones, small pumpkins. Add scoops, cups, and plastic tweezers.
- Age range: 3–5 years.
- Mess/time level: Medium / set-and-play.
- Skill benefit: Sorting, scooping, sensory regulation.
- Optional twist: Hide letter cards inside for a letter-hunt layer.
Read More: 12 Leaf Sensory Bin Ideas: Fine Motor & Nature Play
Craft 17: Leaf Rubbing Tree Wall Art
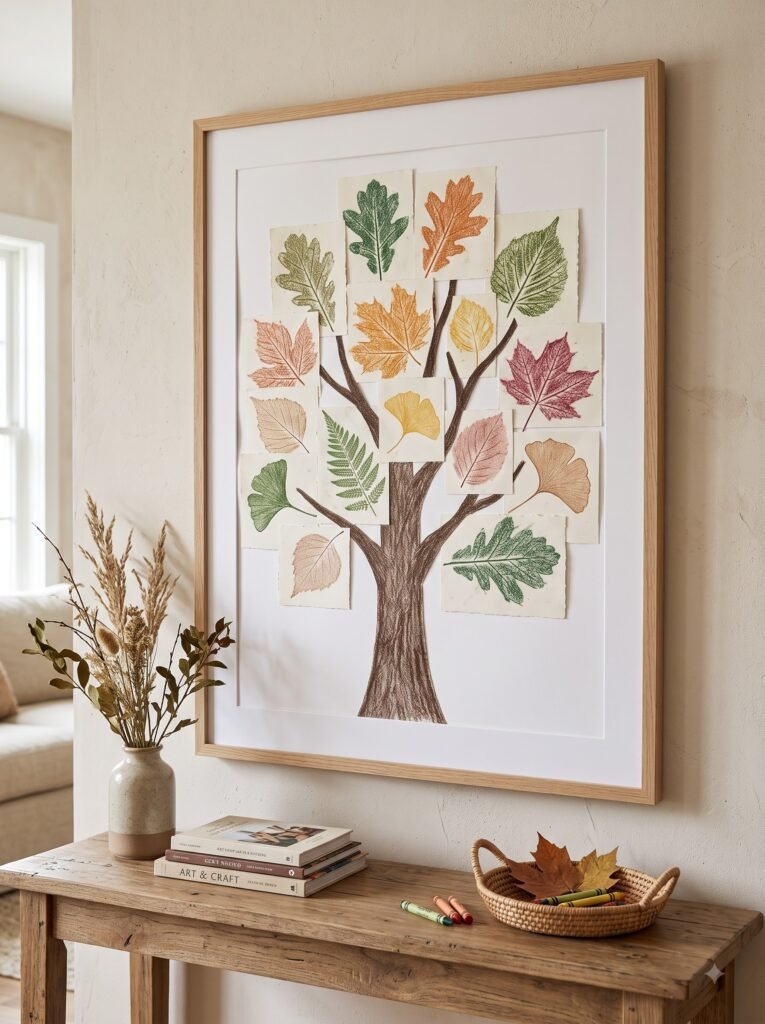
- Why it works: Tree-trunk rubbings behind leaf rubbings make a layered, gallery-worthy keepsake.
- How to make it: Rub a tree’s bark for the trunk. Glue leaf rubbings around the branches. Frame or hang on the fridge.
- Age range: 4–5 years.
- Mess/time level: Low / 20 minutes.
- Skill benefit: Composition, layering.
- Optional twist: Use the same tree (in a backyard) every season for a year-long series.
Craft 18: Leaf Shadow Box
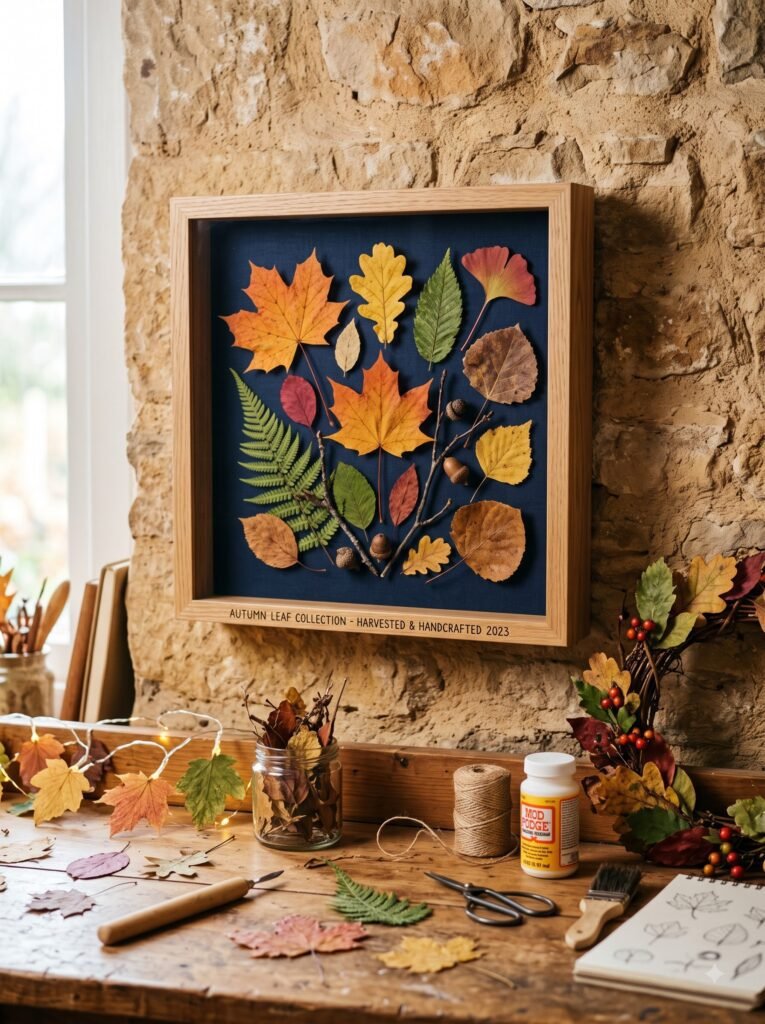
- Why it works: A framed layer of leaves becomes a true keepsake — for grandparents especially.
- How to make it: Arrange pressed leaves inside a small wooden shadow-box frame. Add a tiny ribbon bow or seed for accent.
- Age range: 4–5 years (with adult framing).
- Mess/time level: Medium / 30 minutes.
- Skill benefit: Curating, gifting.
- Optional twist: Date and sign on the inside frame edge.
Craft 19: Leaf Crown of Acorns
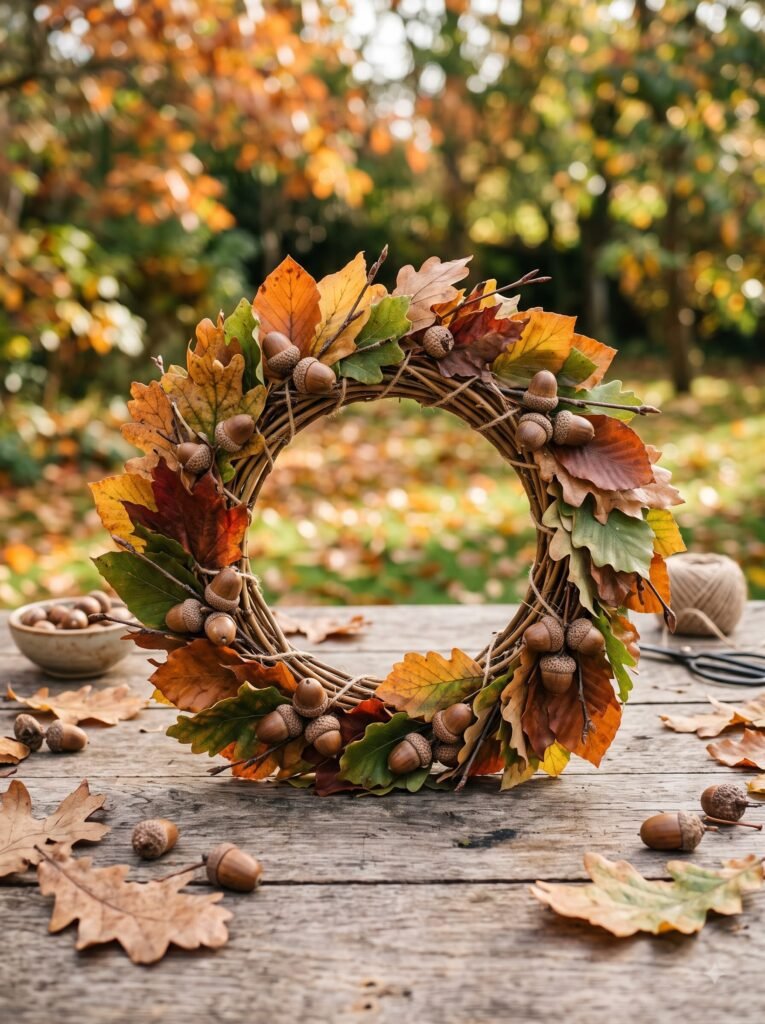
- Why it works: Mixing real leaves with acorns gives kids a fuller-forest feel.
- How to make it: Twist cardstock into a head-sized circle. Glue alternating leaves and acorn caps along the band.
- Age range: 4–5 years.
- Mess/time level: Medium / 30 minutes.
- Skill benefit: Pattern-making.
- Optional twist: Ask kids to count the acorns as they glue.
Craft 20: Leaf-on-Wood Burnish
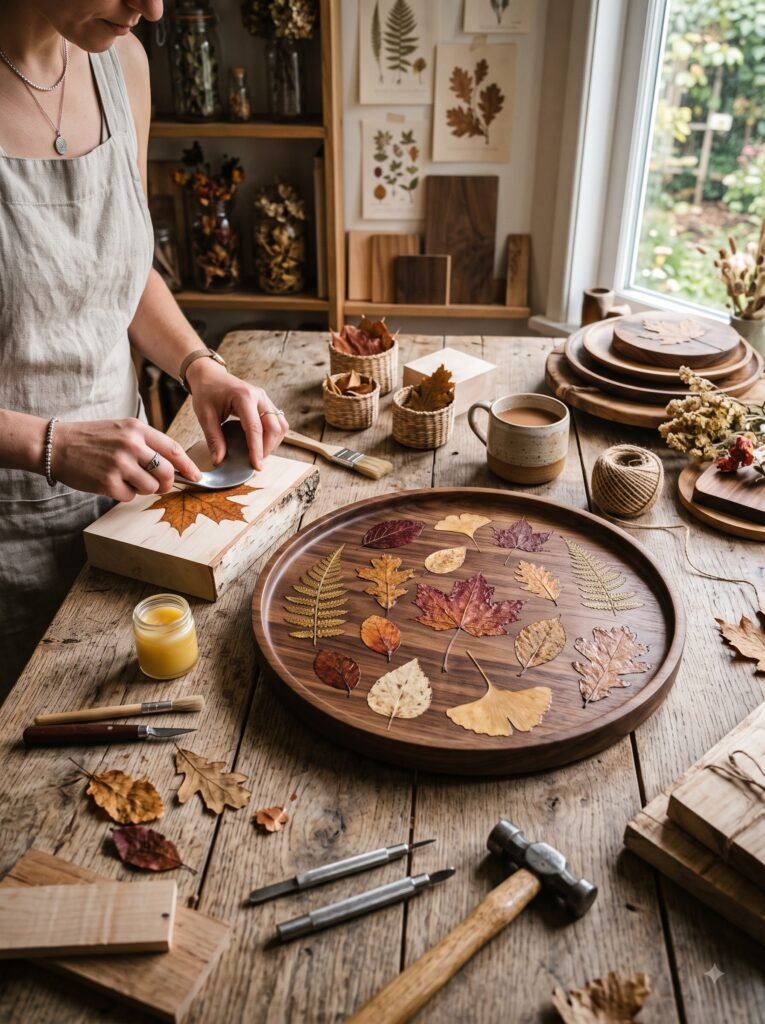
- Why it works: Pressing a leaf onto a smooth wood slice with a spoon leaves a beautiful leaf-print outline.
- How to make it: Lay a leaf on a wooden slice. Press hard with the back of a spoon until the veins emboss the wood. Optionally trace lines with a marker.
- Age range: 4–5 years.
- Mess/time level: Low / 20 minutes.
- Skill benefit: Pressure awareness.
- Optional twist: Stack two slices with twine for a hanging ornament.
Craft 21: Leaf Window Cling
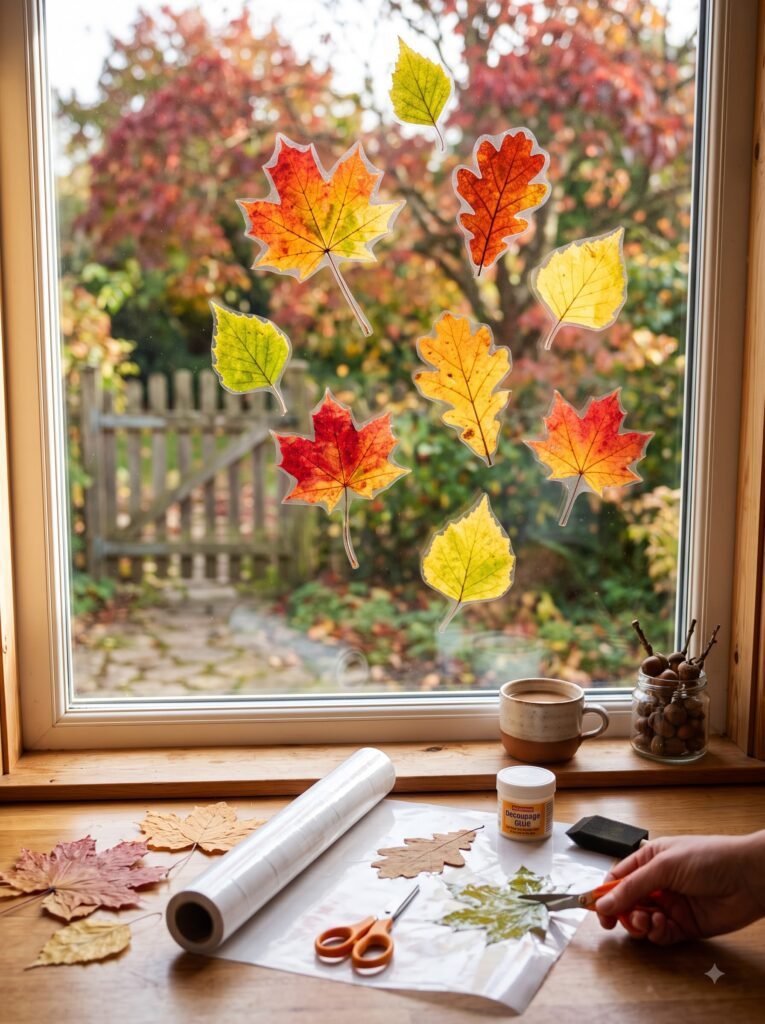
- Why it works: Laminated leaves stick to windows with a tiny bit of static and look magical on a gray day.
- How to make it: Laminate leaves with self-adhesive laminating sheets. Trim. Stick to windows.
- Age range: 3–5 years.
- Mess/time level: Low / 15 minutes.
- Skill benefit: Spatial planning.
- Optional twist: Sort clings by color into a window “rainbow.”
Craft 22: Leaf Nature Journal Page
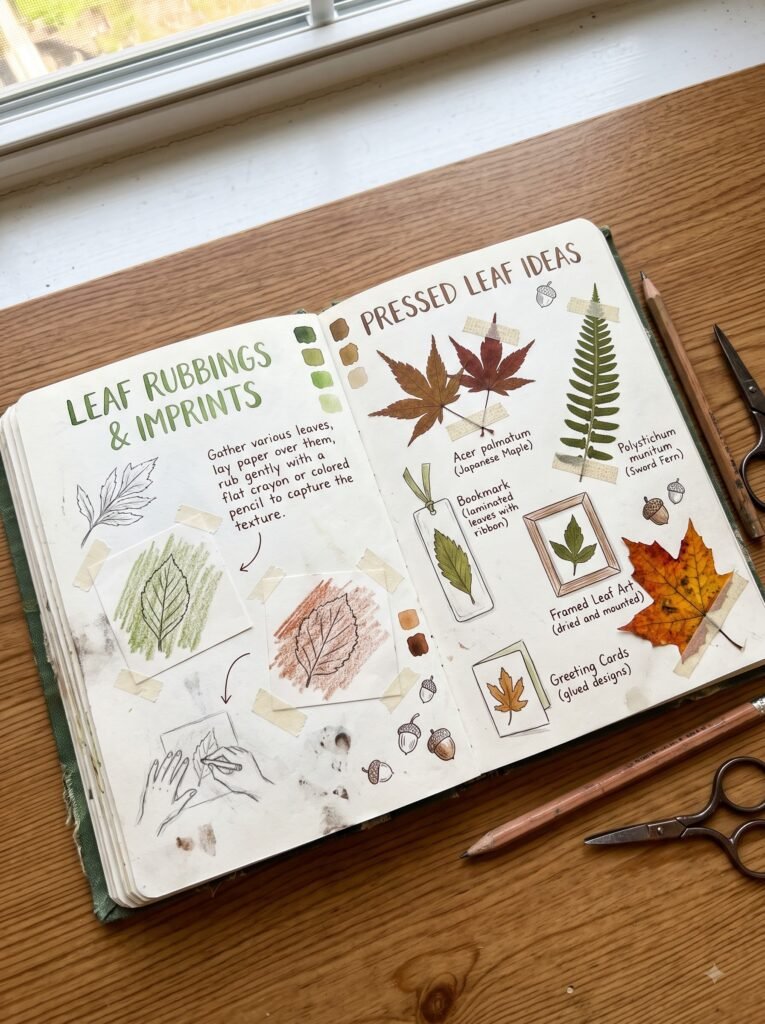
- Why it works: Pairing a leaf with a tiny drawing turns craft time into quiet observation.
- How to make it: Glue one pressed leaf in a journal. Kids draw what they remember about the walk — trees, weather, who came along.
- Age range: 4–5 years.
- Mess/time level: Low / 20 minutes.
- Skill benefit: Memory, drawing, writing pre-skills.
- Optional twist: Add a child-spelled sentence (“I saw a red leaf.”).
Craft 23: Leaf Wreath
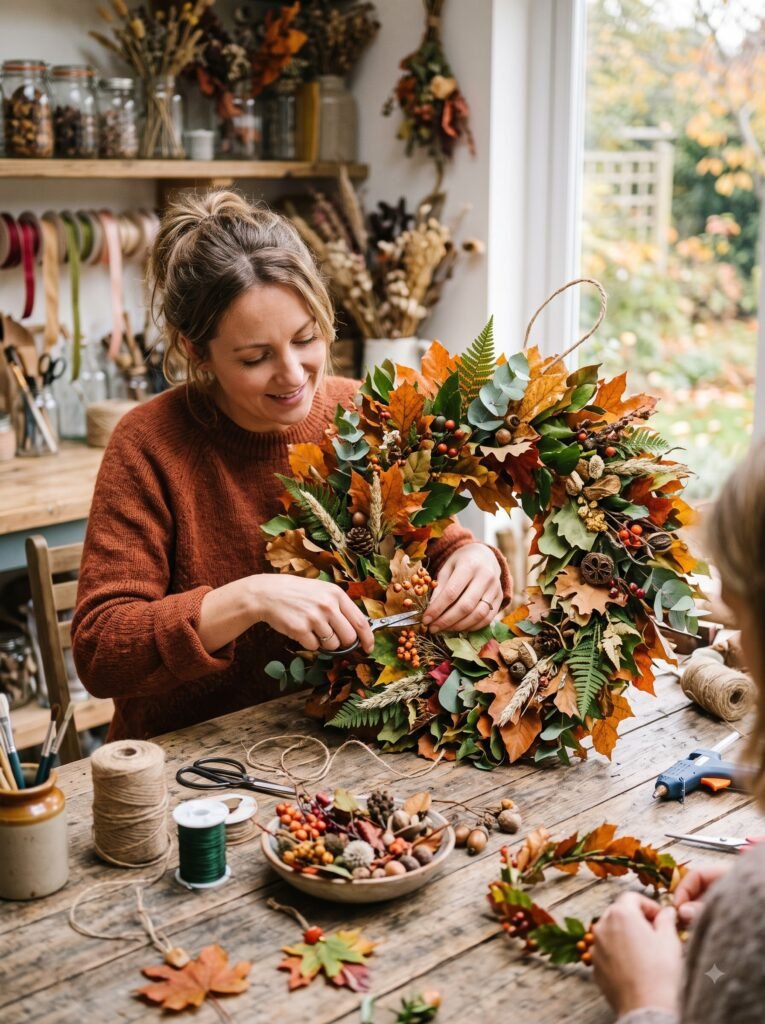
- Why it works: A small wreath hung on a door is a perfect first “hosting” moment for kids.
- How to make it: Cut a cardboard ring. Glue pressed leaves around the ring. Add a twine bow.
- Age range: 4–5 years.
- Mess/time level: Medium / 30 minutes.
- Skill benefit: Decorating.
- Optional twist: Hot-glue a felt acorn to the bottom as a “doorbell.”
Craft 24: Leaf Shadow Puppet
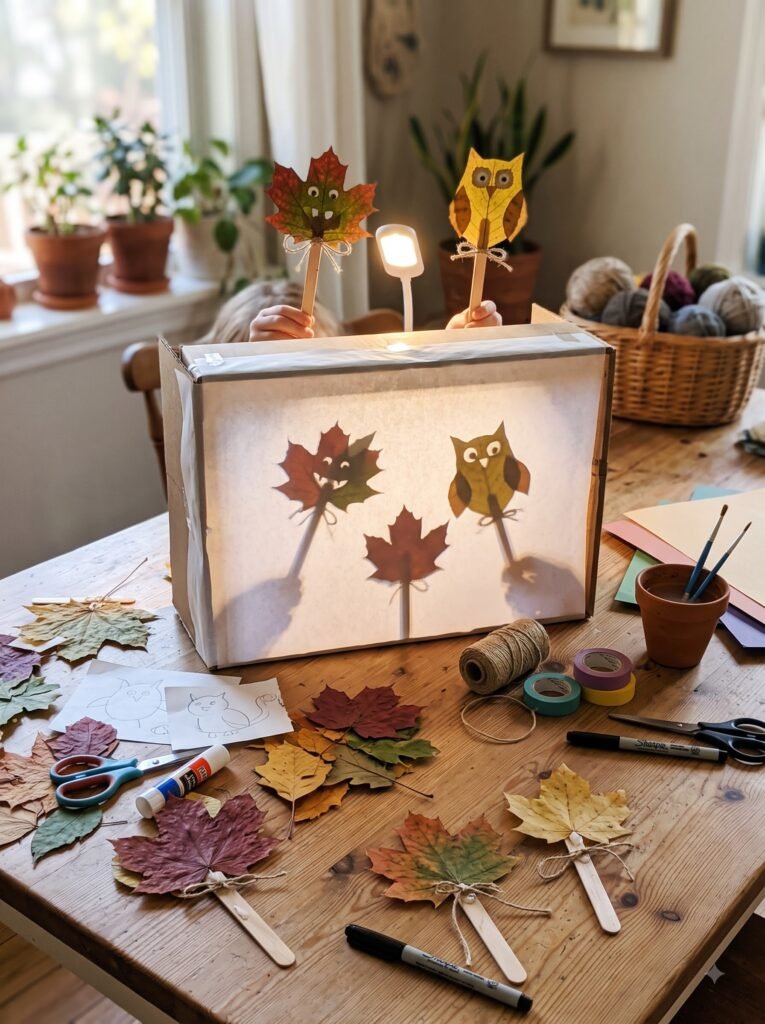
- Why it works: Hold a real leaf between a flashlight and a wall — its vein pattern creates a shadow forest.
- How to make it: Tape pressed leaves to craft sticks. Shine a flashlight on a wall. Move the leaves around to make “shadow trees.”
- Age range: 3–5 years.
- Mess/time level: Low / 15 minutes.
- Skill benefit: Light-and-shadow awareness.
- Optional twist: Tell a “leaf forest” bedtime story using the shadows.
Craft 25: Leaf Pebble Pets
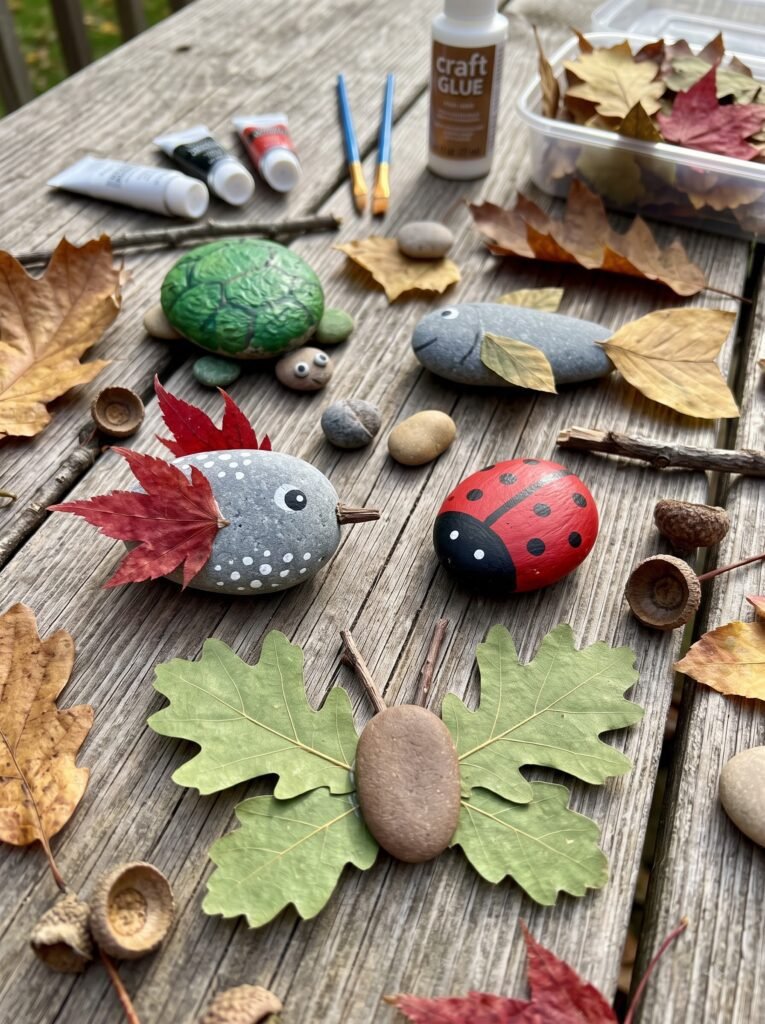
- Why it works: Combining a leaf “shell” with a tiny rock gives kids a portable friend.
- How to make it: Glue a small leaf flat against a smooth pebble. Draw eyes on the pebble. Let dry.
- Age range: 3–5 years.
- Mess/time level: Low / 15 minutes.
- Skill benefit: Miniature play.
- Optional twist: Kids name and “feed” their leaf pets during pretend play.
Leaf Craft Supply Checklist (Printable)
Save this once and reuse it all autumn.
Foraging bag
- A small paper or cloth bag
- A pair of kid-friendly scissors (adult use only)
- A magnifying glass for leaf-spotting
Pressing & preserving
- A heavy book or flower press
- Wax paper + iron + cloth
- Vegetable glycerin + jar
- Parchment sheets for storage
Craft basics
- White cardstock and construction paper
- Washable glue and glue sticks
- Self-adhesive laminating sheets
- Clear contact paper
- Mod Podge (for decoupage — works on shape, less so on color retention over time)
- Battery tea lights (no real flames)
- Crayons and washable tempera paint
- Twine, ribbon, and yarn
Cleanup
- A damp cloth
- A small broom and dustpan
- A smock or old t-shirt
- A spare tablecloth
Tips for Setting Up a Calm Craft Space
Pick One Corner
Don’t overhaul your kitchen. One cleared table corner with a washable mat under it is plenty. Cleanup becomes ten minutes instead of an hour.
Pre-Portion the Supplies
Put each project’s supplies in its own small tray or shoebox lid before craft time. Kids stay independent, and you stay patient.
Embrace the Mess
Leaves flake, glue drips, paint wanders. Use a wipeable surface, keep water nearby, and let crumbs happen. Real leaves + real kids = real (gentle) mess.
Read the Mood
A tired preschooler doesn’t need a new crown — they need a quiet leaf rubbing. Match the craft to the child’s energy, not your Pinterest mood board.
Save the Best Leaves
Some of your foraged leaves will be too pretty to glue. Tuck those away for shadow-box projects later. Real leaf crafts stretch across seasons when stored well.
Common Mistakes Parents Make (and Easy Fixes)
- Forgetting to check for poison ivy. Three leaflets with a reddish center spot? Leave it. If in doubt, stay out.
- Skipping the pressing step. Fresh, plump leaves curl up and look messy once glued. Pressed or glycerin-soaked leaves stay flat and stay beautiful.
- Using too much glue. A thin smear of glue holds a leaf better than a thick puddle. Excess glue turns leaves brown and brittle.
- Painting the wrong side. Painting the back (vein side) of a leaf produces a more textured print than the smooth side.
- Cramming too many crafts into one day. Two crafts a week beats six. Over-scheduling turns craft time into a chore.
- Letting leaves sit too long before using. A leaf from two months ago crumbles. Press then craft within a few weeks for best results.
- Forgetting smocks. Tempera paint, Mod Podge, and glue all land somewhere unexpected. Smocks save clothes.
- Reaching for the iron while kids play. Always iron leaves before the kids arrive — never leave a hot iron in a craft space with children.
- Pinning leaves with sharp pins for mobiles. Use twine loops or non-toxic glue dots instead. Safer for small hands.
- Throwing leaves in the trash the same day. Pressed leaves can power a second craft next week. Store with parchment between layers.
- Ignoring sniffle season. Some kids are sensitive to leaf mold or pollen. Laminate leaves or use gloves during prep if your child has seasonal allergies.
- Mistaking fir or spruce for broad leaves. Needles are fine for crafts, but they’re not “leaves.” Stick to broadleaf varieties for the projects above.
Leaf Craft Captions: 90 Ideas
50 Cute Captions
- Crunchy hands, happy hearts.
- Little forager, big find.
- Tiny fingers, big autumn.
- One leaf at a time.
- Today’s leaf of the day.
- Found this. Made this.
- Falling for fall, slowly.
- Sunny window + sticky hands.
- The texture of Tuesday.
- Leaf it to me.
- Cozy craft hour.
- Slow smock morning.
- Acorn hats and leaf capes.
- Picking, pressing, pasting.
- Crinkle season.
- This little leaf.
- Autumn in my lap.
- Squish it, press it, love it.
- A leaf-lover’s afternoon.
- Forest floor magic.
- From sidewalk to suncatcher.
- Pressed, but not stressed.
- Wiggle, giggle, glue.
- My leaf, my art.
- The leaf whisperer.
- Cardstock, crayons, calm.
- Smell the cinnamon season.
- Quiet hands, big art.
- Leaf by leaf.
- Maple moment.
- Beech beats.
- Oak afternoon.
- From bag to bookmark.
- The art of slowing down.
- Just-press art.
- Pressing into fall.
- Slow-season studio.
- The big leaf swap.
- Feel-good foliage.
- Crunchy hands, full heart.
- Bringing the outside in.
- Brown paper, bright leaves.
- Cardstock kindness.
- Leaf dishwasher. (Kid joke.)
- Sidewalk souvenirs.
- Sorting the colors of fall.
- Noticing with you.
- A leaf for every mood.
- The day’s tiniest win.
- Fall in a frame.
10 Funny Captions
- We made it until snack time without spilling paint. Mostly.
- This kid assigns full names to leaves.
- Apparently, leaf chinchillas are a thing now.
- Asking your preschooler to “pick ONE leaf” is a trap.
- Mom has glue in her hair. Don’t ask.
- If found, please return this child to the nearest leaf pile.
- Leaf or lunch? Tough call.
- Crunch the leaf, not the crayon.
- Day three of leaf hoarding.
- We’re officially “leaf people” in this house.
10 Sentimental Captions
- “I want to remember the exact way you picked this one up.”
- Autumn through your small hands.
- A leaf, an afternoon, a memory.
- Today you noticed veining.
- You taught me to slow down.
- Your eyes caught this leaf first.
- The smallest hands hold autumn gently.
- You smelled every leaf today.
- One leaf for the page, dozens for my heart.
- The year you became a leaf person.
10 Instagram Captions
- Crunchy hands, warm hearts, real leaves.
- Today’s leaf + my preschooler + zero regrets.
- Slow season, full hands, loud laughter.
- Cardstock day.
- The texture of fall, as told by a 4-year-old.
- We don’t do fake leaves around here.
- Sunlight + sticky contact paper = magic.
- This one’s going in the memory book.
- Tiny hands collecting tiny things.
- Preschool leaf lab, open for business.
10 Pinterest Captions
- Easy leaf crafts for preschoolers using real leaves — 25 simple projects.
- Fall leaf activities for preschool with printable supply list.
- How to press and preserve real leaves for kids’ crafts.
- Safe leaf crafts for ages 3–5 with mess and time tips.
- Indoor leaf crafts for rainy fall afternoons.
- Real-leaf suncatchers, crowns, and bookmarks for little hands.
- Parent-tested leaf crafts that don’t take all morning.
- Autumn nature crafts for first-time preschool parents.
- No-fuss leaf crafts with safe supplies and easy cleanups.
- Leaf rubric guide for choosing and pressing the best leaves.
Frequently Asked Questions
1. Are real leaves safe for preschoolers to handle?
Mostly yes, as long as you avoid poison ivy, oak, and sumac, and any leaves from plants you cannot identify. Wash hands after the craft, especially if your child has seasonal allergies, and keep leaves out of mouths. When in doubt, use laminated or contact-paper versions.
2. How do I preserve leaves so they don’t crumble?
Press them in a heavy book for 3–7 days, or press quickly between wax paper with a warm iron (no steam, high heat, with a cloth on top). Both methods keep leaves flat, colorful, and craft-ready for weeks.
3. Can leaves be preserved with glycerin?
Yes. Mix 1 part vegetable glycerin with 2 parts warm water and soak leaves for 2–3 days. They’ll come out soft and supple — perfect for crowns, lanterns, and 3D crafts where you need leaves to bend instead of snap.
4. What’s the best way to identify poison ivy?
Look for clusters of three leaflets with a small reddish spot where the side leaflets meet the stem. The leaves can be shiny or dull, and the plant can grow as a vine or shrub. If you see “leaves of three, let it be.”
5. What types of leaves are best for crafts?
Maple, oak, beech, birch, aspen, ginkgo, and sycamore are sturdy, recognizable, and abundant in most U.S. neighborhoods. Choose a mix of shapes for the most interesting crafts.
6. How do I keep leaves from curling after gluing?
Press them first, apply glue in a thin even layer, and weigh them down under a book for 10–15 minutes after gluing. Mod Podge or decoupage glue holds leaves flatter than white glue.
7. Are these crafts safe for 3-year-olds?
Yes, with adjustments. Skip the iron, skip Mod Podge bowls (long drying, balloon popping), and skip anything small enough to mouth. The contact paper suncatcher is one of the safest for the youngest crafters.
8. How long do pressed leaves last?
Pressed leaves kept dry and out of sunlight stay usable for 6 months to a year. Laminated or contact-paper-sealed leaves can last for many years. Glycerin-softened leaves last 1–2 years if stored loosely.
9. Can I do leaf crafts indoors without making a mess?
Yes — the contact paper suncatcher, shadow puppet, and laminated bookmark are practically mess-free. For other crafts, lay a washable mat, use smocks, and keep a damp cloth nearby.
10. What should I do with leftover leaves?
Press and store them in parchment sleeves, add them to a sensory bin, or use them for next week’s craft. A pressed-leaf envelope can fuel a full month of future projects.
11. Can I use fake leaves instead?
You can — but real leaves offer texture, scent, and color variation that fakes cannot match. If you must use fakes, the rubbings and contact paper crafts still work, though the sensory magic is reduced.
12. How do I involve siblings of different ages?
Pair the older child as the “leaves manager” who presses and pre-cuts materials for the younger one. Younger children do the gluing and arranging. Everyone gets a role that matches their stage.
Final Thoughts
Real leaves won’t be perfect, and neither will the craft.
Some projects will end up lopsided. Some will get torn before the glue dries. Some will be made on the wrong side of the leaf entirely. That’s all part of the charm. The goal of leaf crafts for preschoolers using real leaves isn’t a magazine-worthy result — it’s a hand stuck inside a leaf pile, picking up something beautiful, and wanting to share it with you.
You’re not just making art. You’re raising a child who notices the world. That’s a beautiful thing to grow this autumn, leaf by leaf.